AWS Fargate 101: Run Production Applications Without Servers

Today, we'll discuss containers, specifically within AWS, focusing on ECS Fargate. AWS provides two primary container orchestration services: EKS, which uses Kubernetes (with or without Fargate), and ECS, which utilizes Docker or Firecracker.
In this demonstration, we'll deploy a simple Spring Boot web server application within a Fargate task, step-by-step. This setup will be integrated with Route 53 and an Application Load Balancer.
Let's begin. Directly executing ./gradle bootRun will download all necessary dependencies, build the application, and start the web server on port 8080.
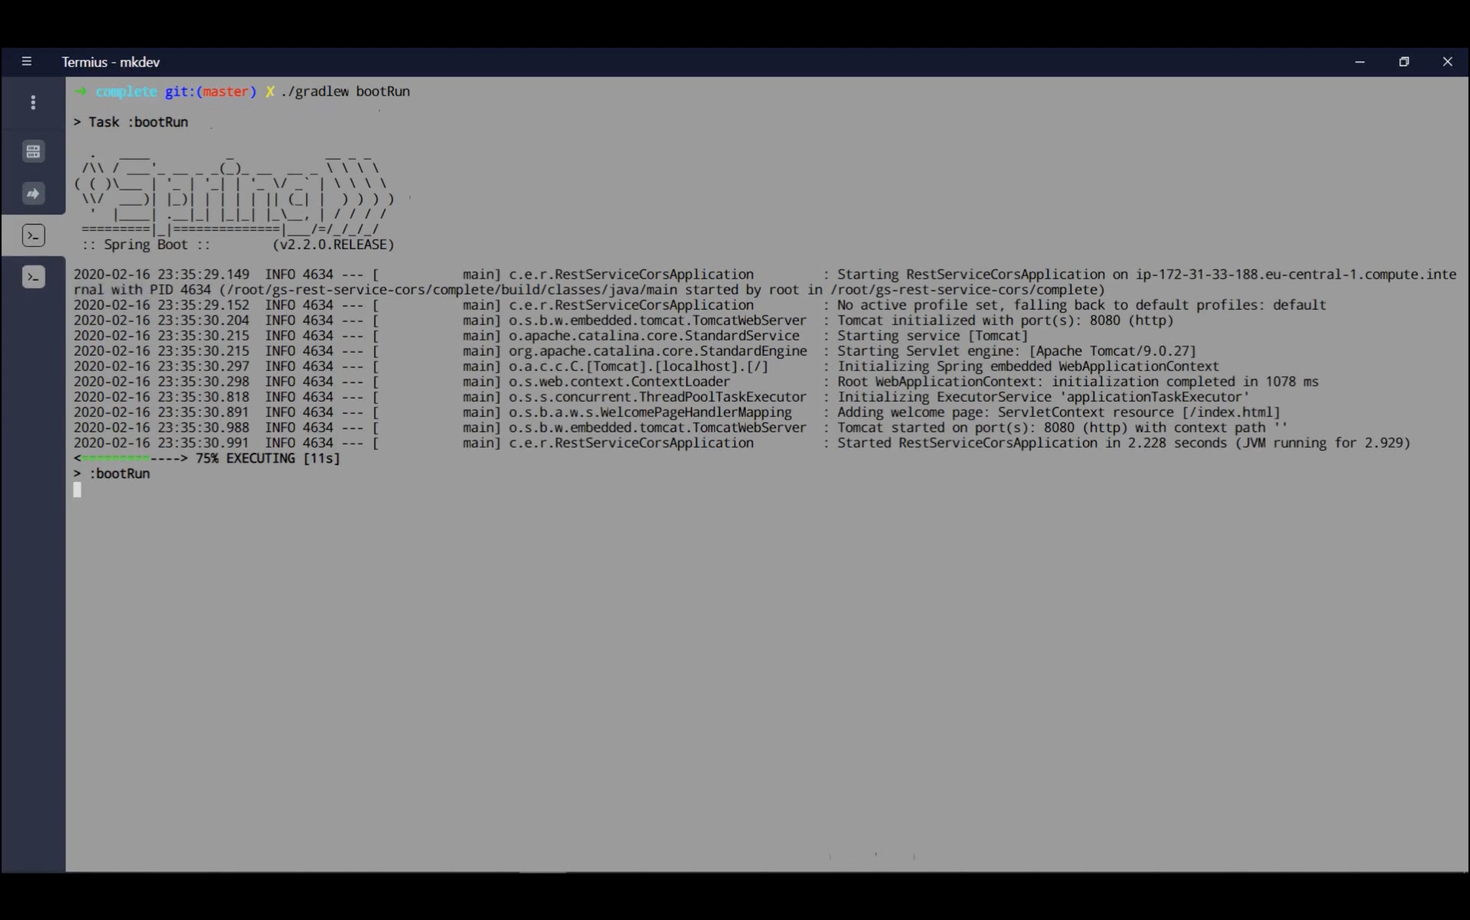
With the application running, we can verify its functionality using a browser or command-line tool. From a separate console, executing:
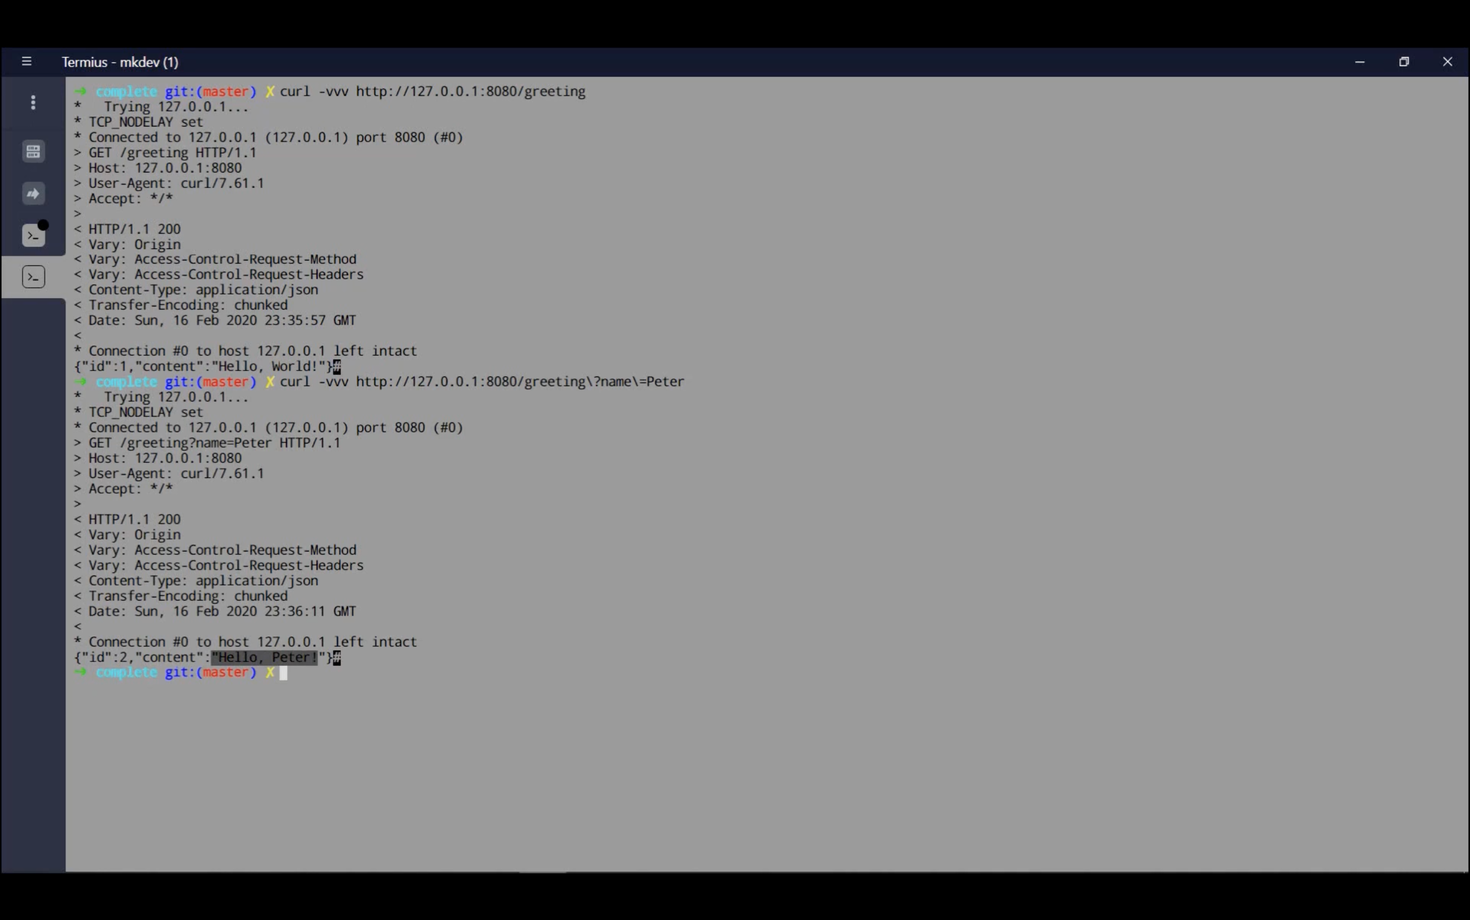
curl -vvv http://127.0.0.1:8080/greeting
will produce a result containing an ID (initially 1) and the "Hello World" message. We'll discuss this ID later when scaling to multiple tasks.
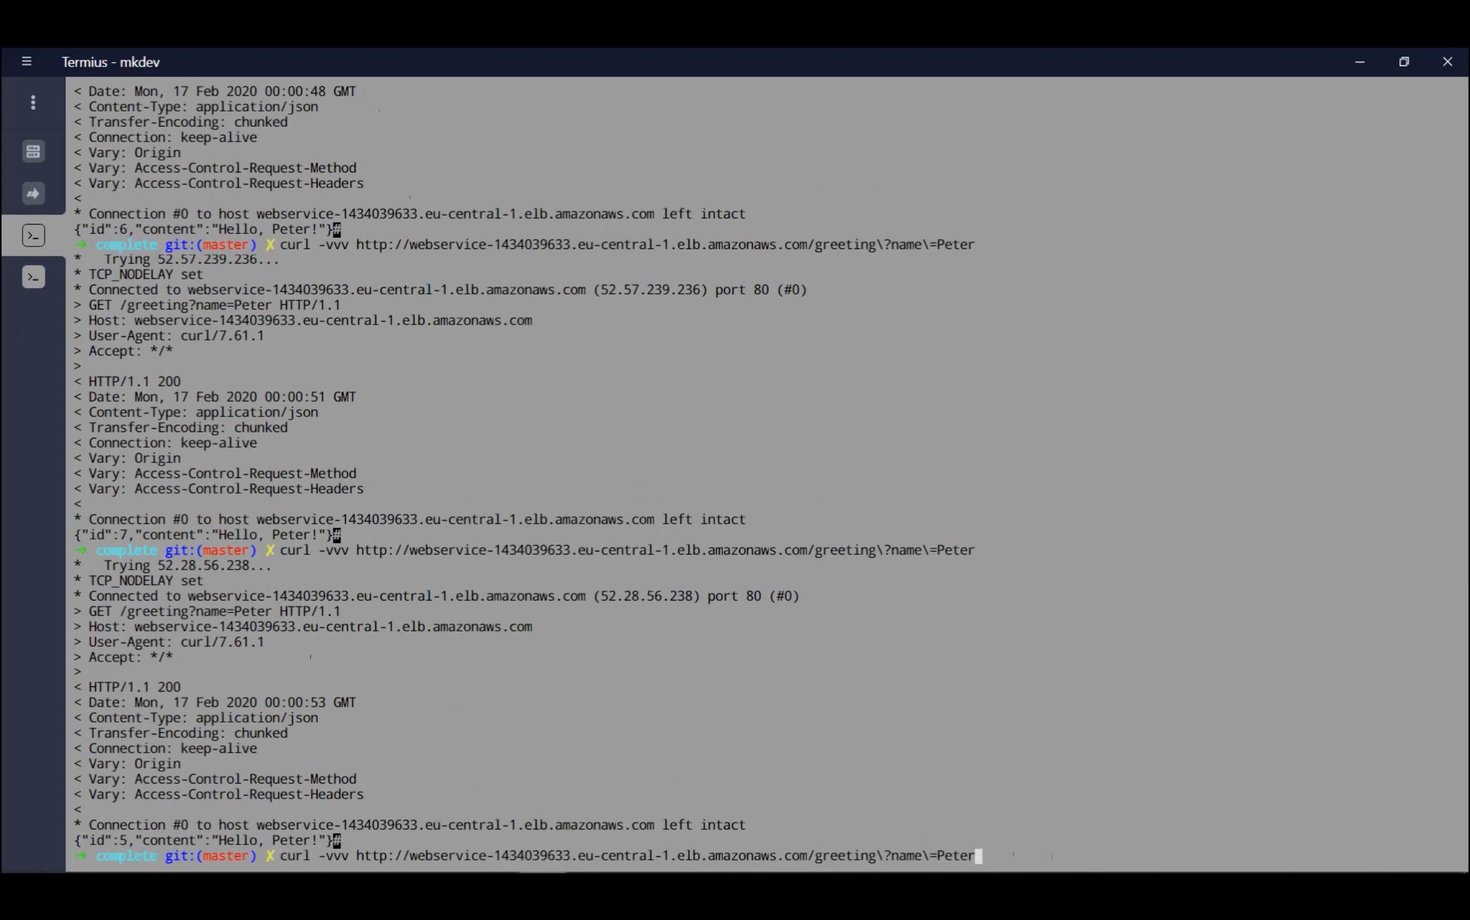
Now, let's pass a parameter to our application:
curl -vvv http://127.0.0.1:8080/greeting?name=Peter
This will return an ID of 2 and the message "Hello Peter."
Next, we'll create the JAR file using ./gradlew build. This JAR file will be incorporated into a Dockerfile. (We'll cover integrating this with a Jenkins pipeline in a future discussion.)
Our Dockerfile will use OpenJDK as a base image, copy the JAR file, and execute java -jar. For simplicity, we'll omit versioning, variables, and tags, focusing instead on Fargate.
We'll now build our Docker image. Once complete, we'll push it to AWS ECR. First, configure your .aws credentials. Then, establish a connection between your local Docker installation and ECS using:
aws ecr get-login
Copy the output, remove the -e none portion from the token, execute the docker login command, and you'll be connected to ECR.

In AWS, we'll create a repository in ECR. Navigate to ECR, click "Get started," and then "Create repository." Name the repository (e.g., "webserver").
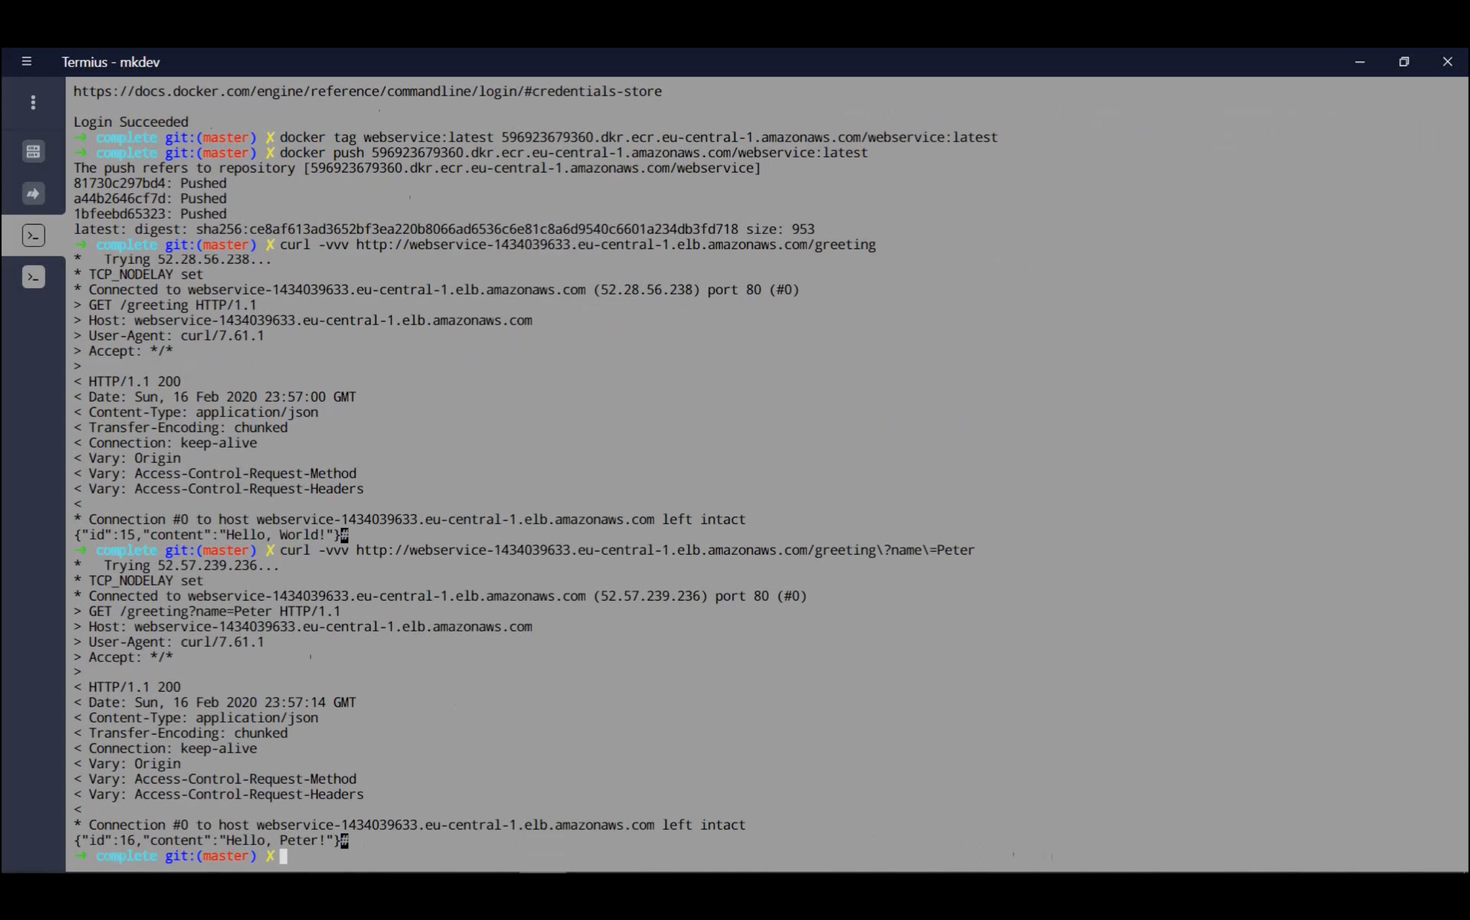
Clicking "View push commands" in the top right corner will display the necessary steps. First, tag the image using docker tag, then push it with docker push. You can use the "View push commands" option to get the full commands. In our case, we'll use the "latest" tag.
After pushing the image, you can view its URI in the repository details.
Next, we'll create an Application Load Balancer in EC2. This Load Balancer will listen on port 80 and forward traffic to a target group on port 8080 if the target is healthy.
When creating the Load Balancer, provide a name (e.g., "webservice"), select "internet-facing," and leave the port as 80. Choose your desired availability zones.
In the security group settings, allow connections to port 8080, as we'll reuse this security group later.
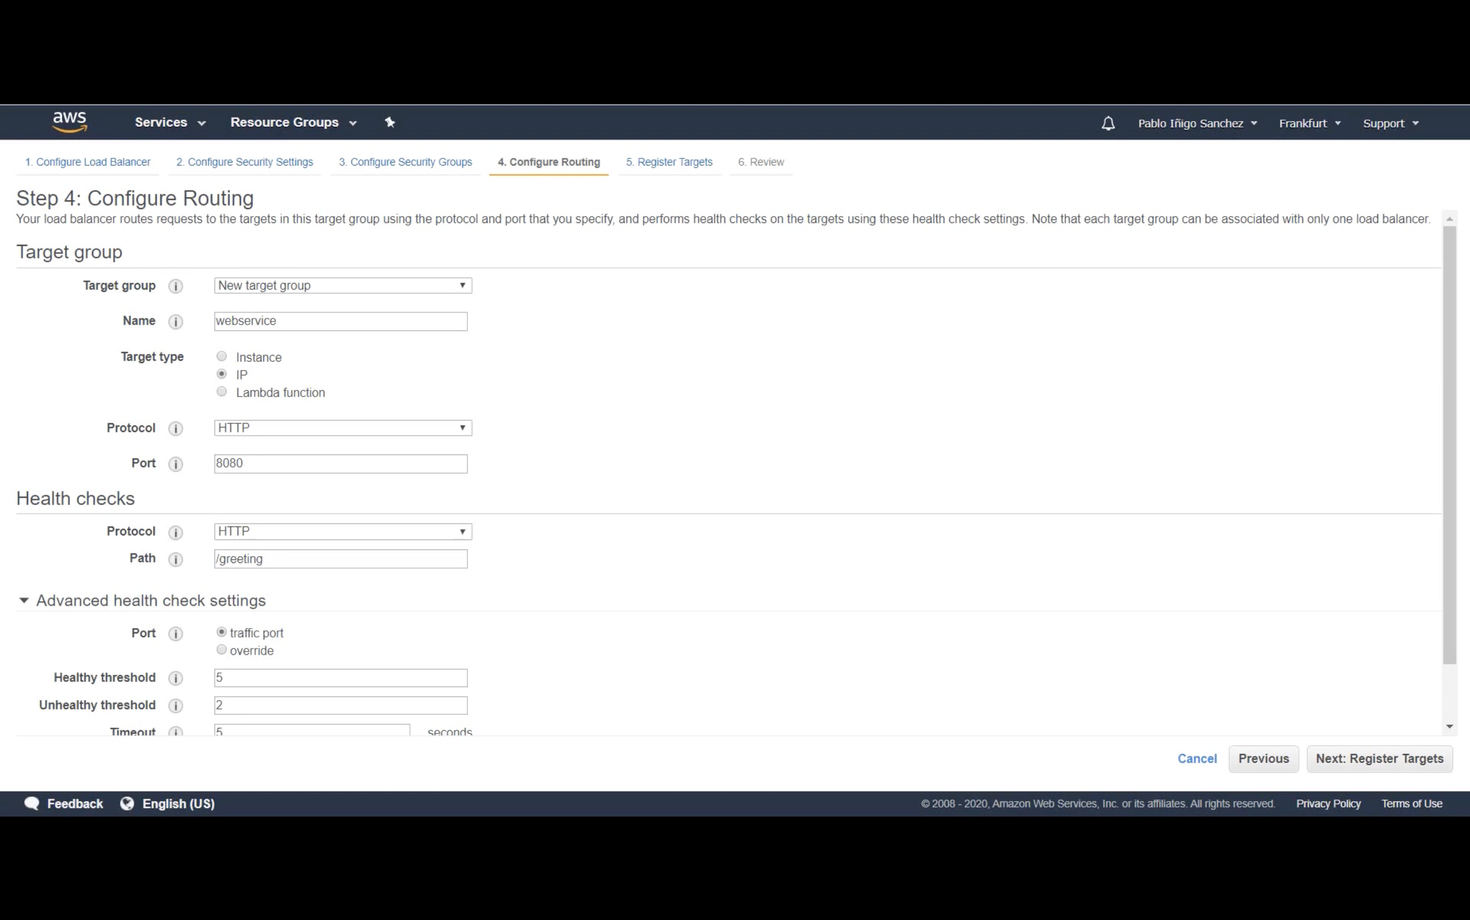
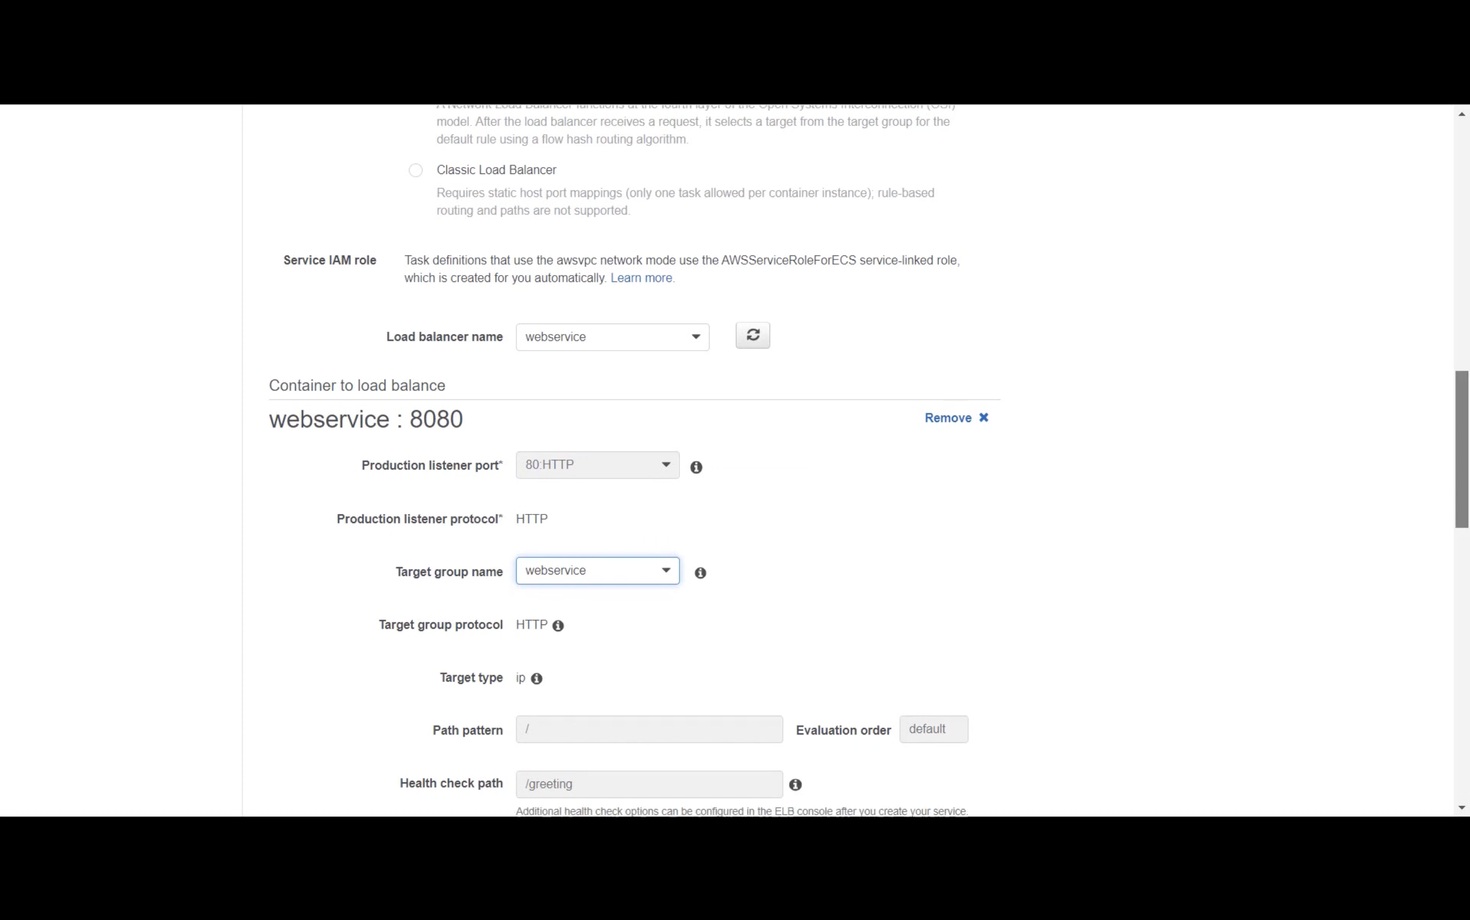
Create a target group named (e.g., "webservice"). Set the target type to "IP," the protocol to 8080, and the path to /greeting. This path will be used for health checks, returning a 200 status code.
With the Load Balancer and target group configured, we'll create a Fargate cluster. Navigate to ECS, select "Clusters," and choose "Create cluster." Select "Network Cluster," provide a name, and enable CloudWatch integration.
This is a serverless cluster. You'll notice no EC2 instances are visible, as AWS manages them.

Now, create a task definition. This defines the resources (CPU, memory) and container configurations (images, environment variables).
Select Fargate, provide a name (e.g., "webservice"), and choose the task role ecsTaskExecutionRole. For additional AWS service access (e.g., S3), you'll need to modify or create new IAM roles.
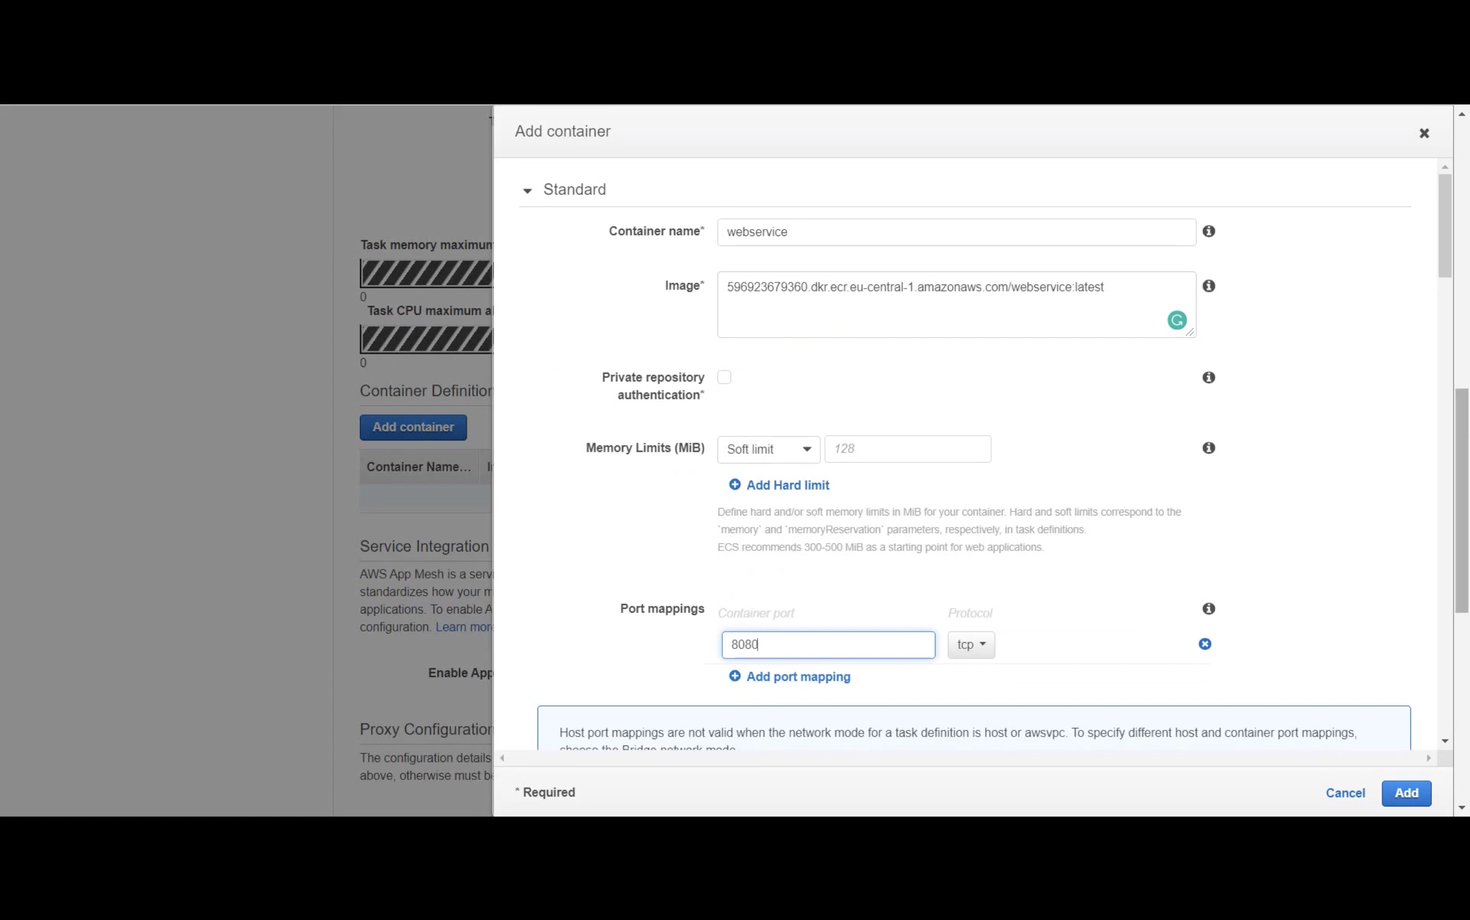
Specify the memory and CPU for the task (e.g., 0.5GB and 0.25vCPU). Add a container, providing a name and the image URI from ECR.
In the container's port mappings, add port 8080 to allow connections. Then, create the task definition.
After creating the task definition, create a service within the cluster. This connects the task definition to the cluster. Select Fargate, choose the task definition and revision (1), and provide a service name. Set the desired number of tasks (initially 1).
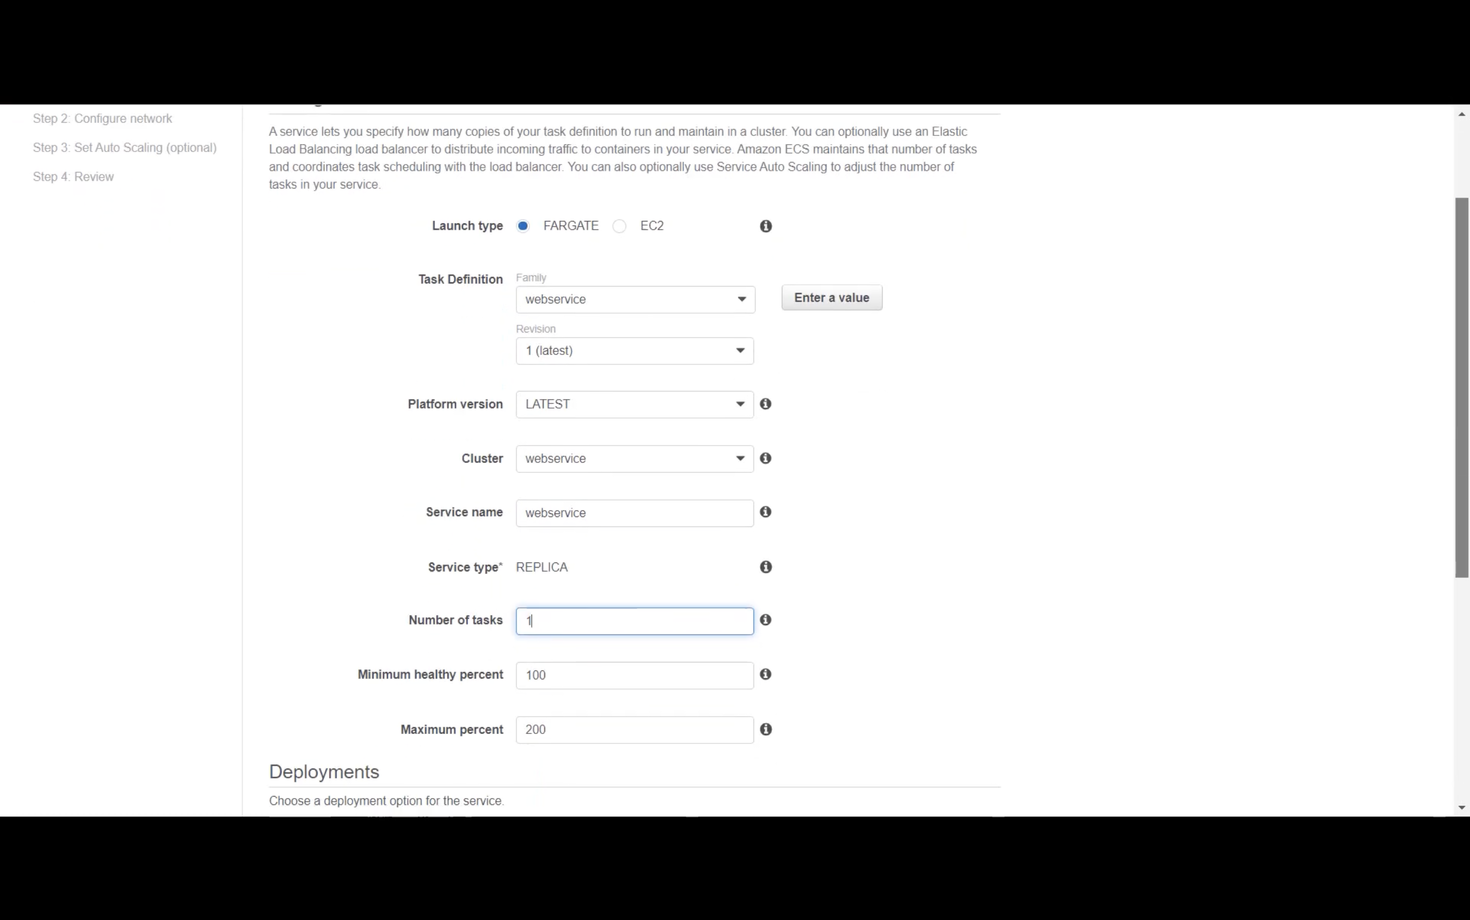
Select the VPC and subnets, and reuse the security group from the Load Balancer setup.
Configure the Load Balancer settings. Choose the previously created Application Load Balancer and connect the Load Balancer's port 80 to the target group's port 8080 by adding it to the Load Balancer.
Enable service discovery integration. This creates a Route 53 entry for each new container. Name the namespace (e.g., "webservice.local").
This process may take some time. You can monitor the domain creation in AWS Cloud Map and the Route 53 entry.
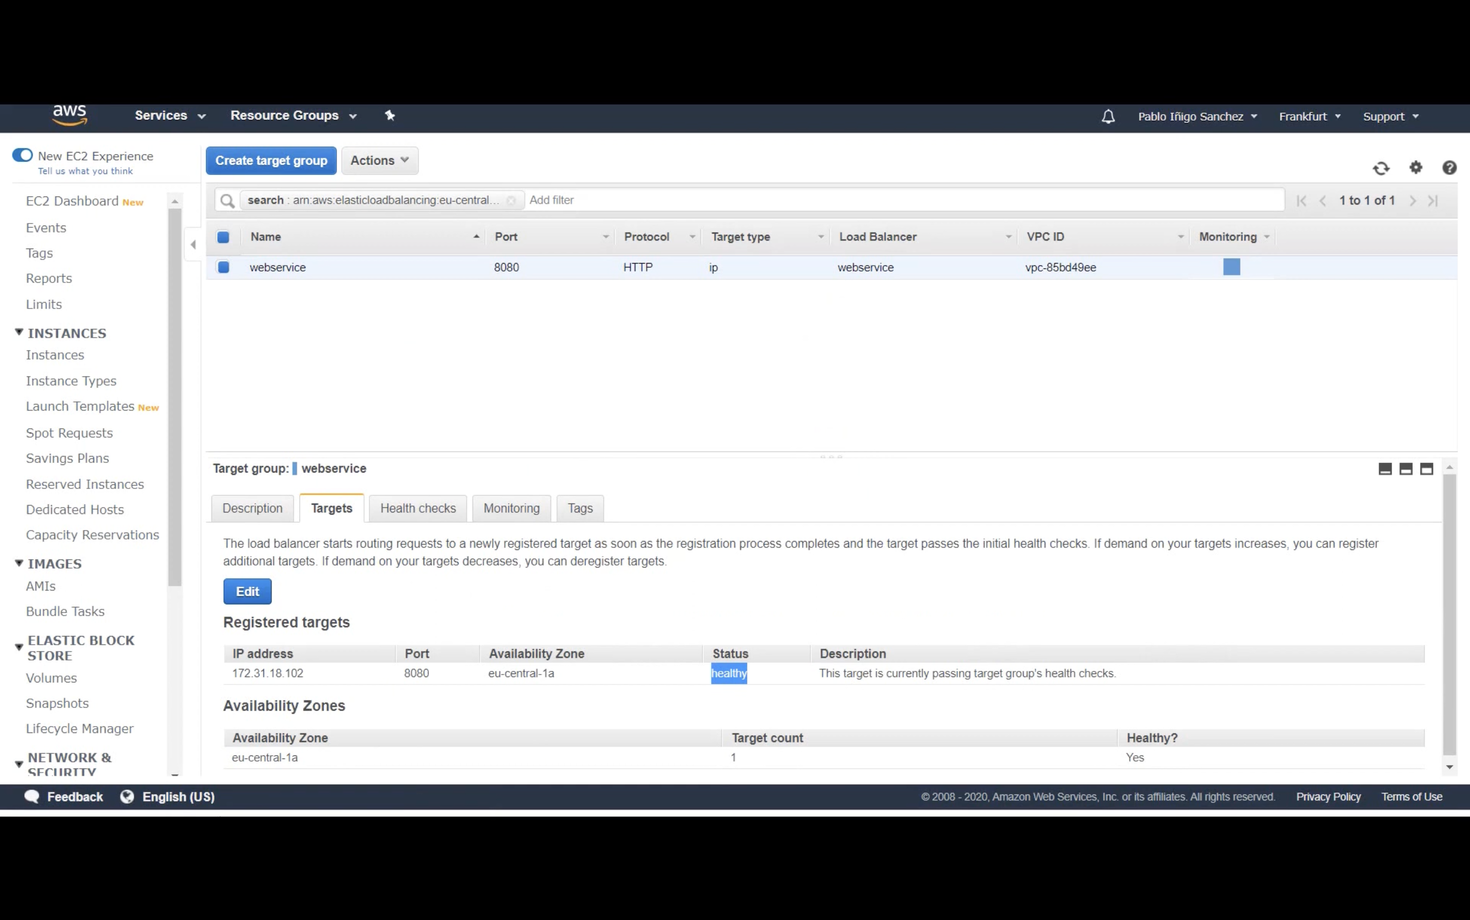
The IP address will appear once the target group approves the task. In the Load Balancer's listeners, the port 80 listener will forward traffic to the target group based on rules, such as the /greeting path.
The target group listens on port 8080, and the targets will show the task's health status.
Copy the Load Balancer's DNS name and test the application using:
curl http://COPIED/greeting
The ID may not be 1 due to the target group's health checks incrementing it.
Now, scale the ECS service from 1 to 5 tasks. Navigate to the service in ECS, click "Update," change the number of tasks, and apply the changes.
Unlike Kubernetes, which uses a service object, ECS requires routing through the Load Balancer.
Logs can be found in CloudWatch. Search for /ecs/webservice or access them through the task details. Each task will have its own log stream.
With 5 tasks running, test the application again. Due to the round-robin load balancing and health checks, the IDs will vary.
This demonstrates ECS Fargate, a serverless container orchestration service. While it may not offer all the features of Kubernetes, it's a cost-effective solution for many use cases. Fargate eliminates the need to manage EC2 instances, EBS volumes, etc. However, limitations exist, such as the inability to directly connect tasks to EFS and restrictions on modifying variables in services.
Here's the same article in video form for your convenience: