Cloudflare for SaaS: Resolving AWS Connection Issues with Multiple CNAMEs, DNS, and SSL Capabilities

Imagine that you are working with AWS and you want to set up a number of external CNAME DNS pointing to your application with a certificate per CNAME.
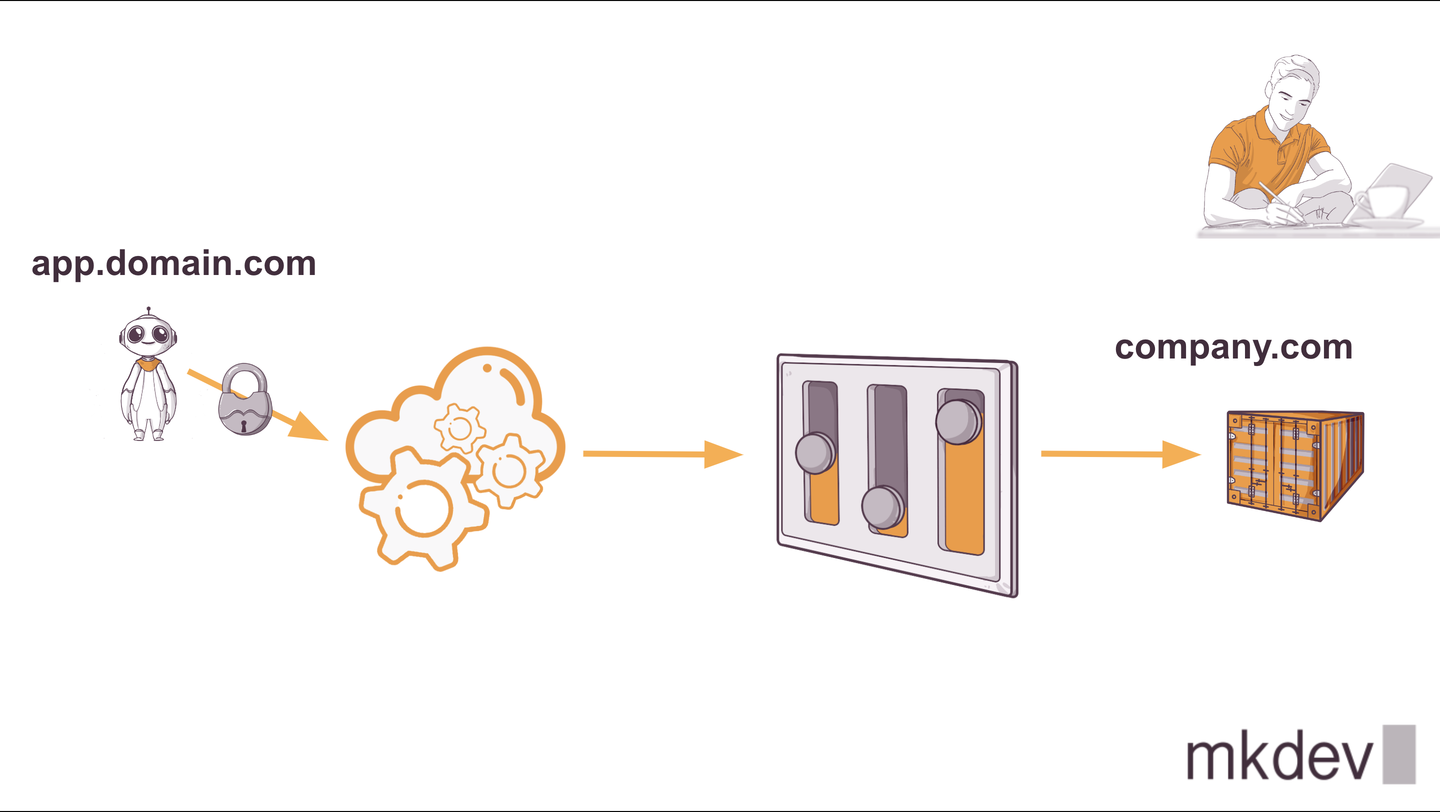
As you can see in this graph, we have an external customer with a domain "app.domain.com" that wants to point with a CNAME to our internal DNS domain "company.com". But I don’t want to have just one customer, I want to have many, and many are not 10, neither 100, but many customers using my app because I want to make real money.
If I want to connect all those CNAME to an application load balancer in AWS and there is a problem because there is a limit of 25 certificates with ACM per ALB. You can find in internet crazy solutions like an ALB every 25 customers or we can use the magic of CloudFlare.
In CloudFlare, we have an option called Cloudflare for SaaS that will allow us to have this magic without the limits that we have with AWS.
First things first, we need to activate Cloudflare for SaaS in case it is not activated, and if needed, add your credit card.
When this is done, we can get started and see how simple the steps are.
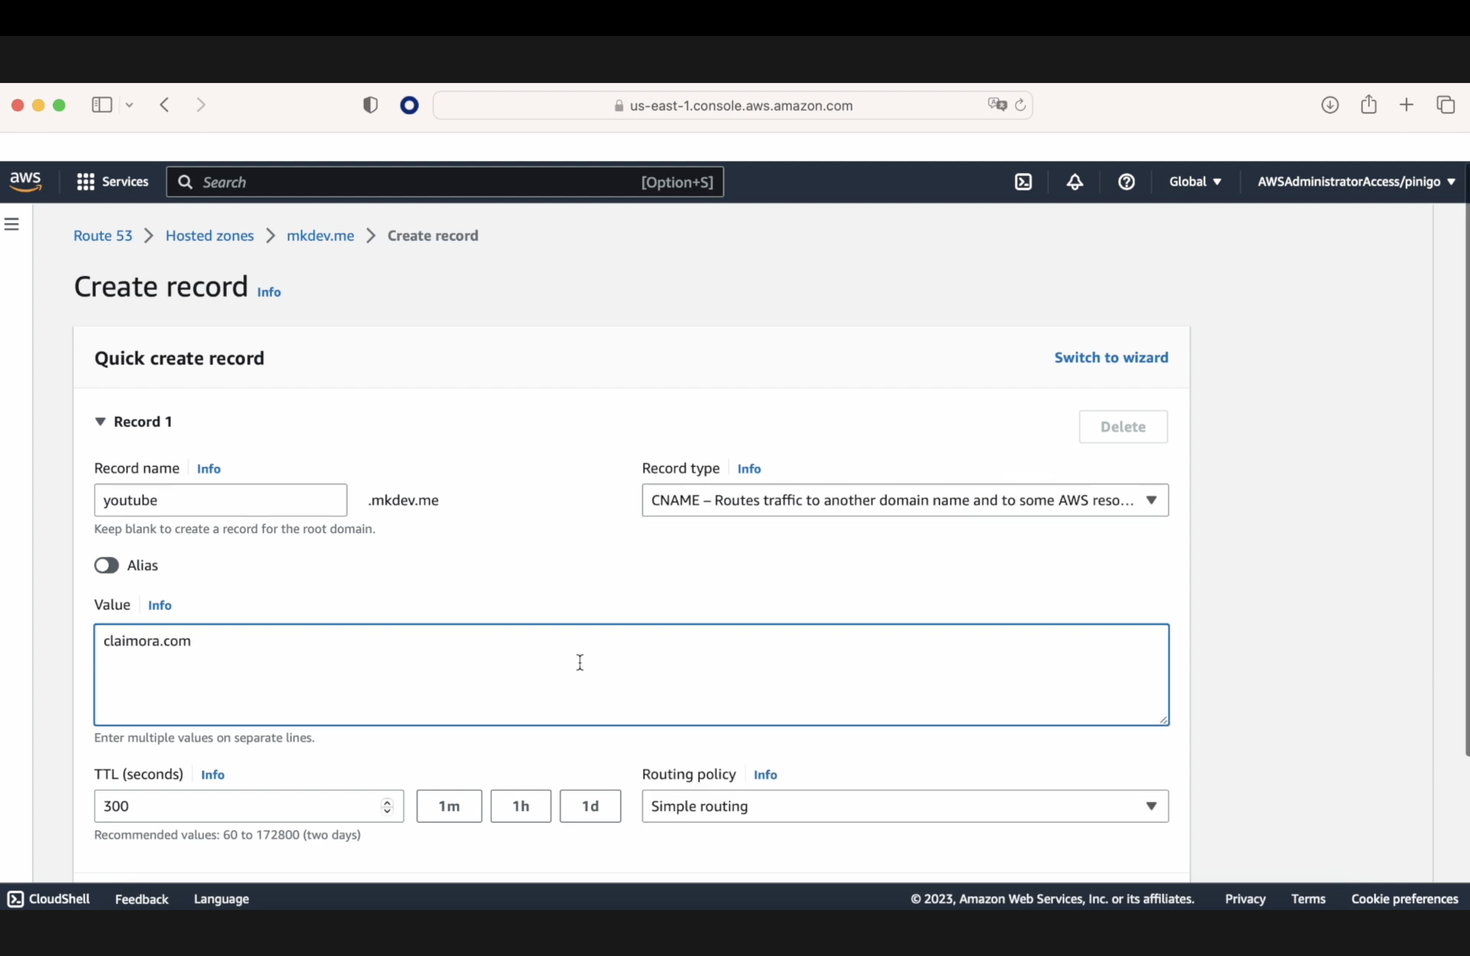
In our Route 53, we are going to create a CNAME entry pointing, for example, YouTube.mkdev.me to claimora.com
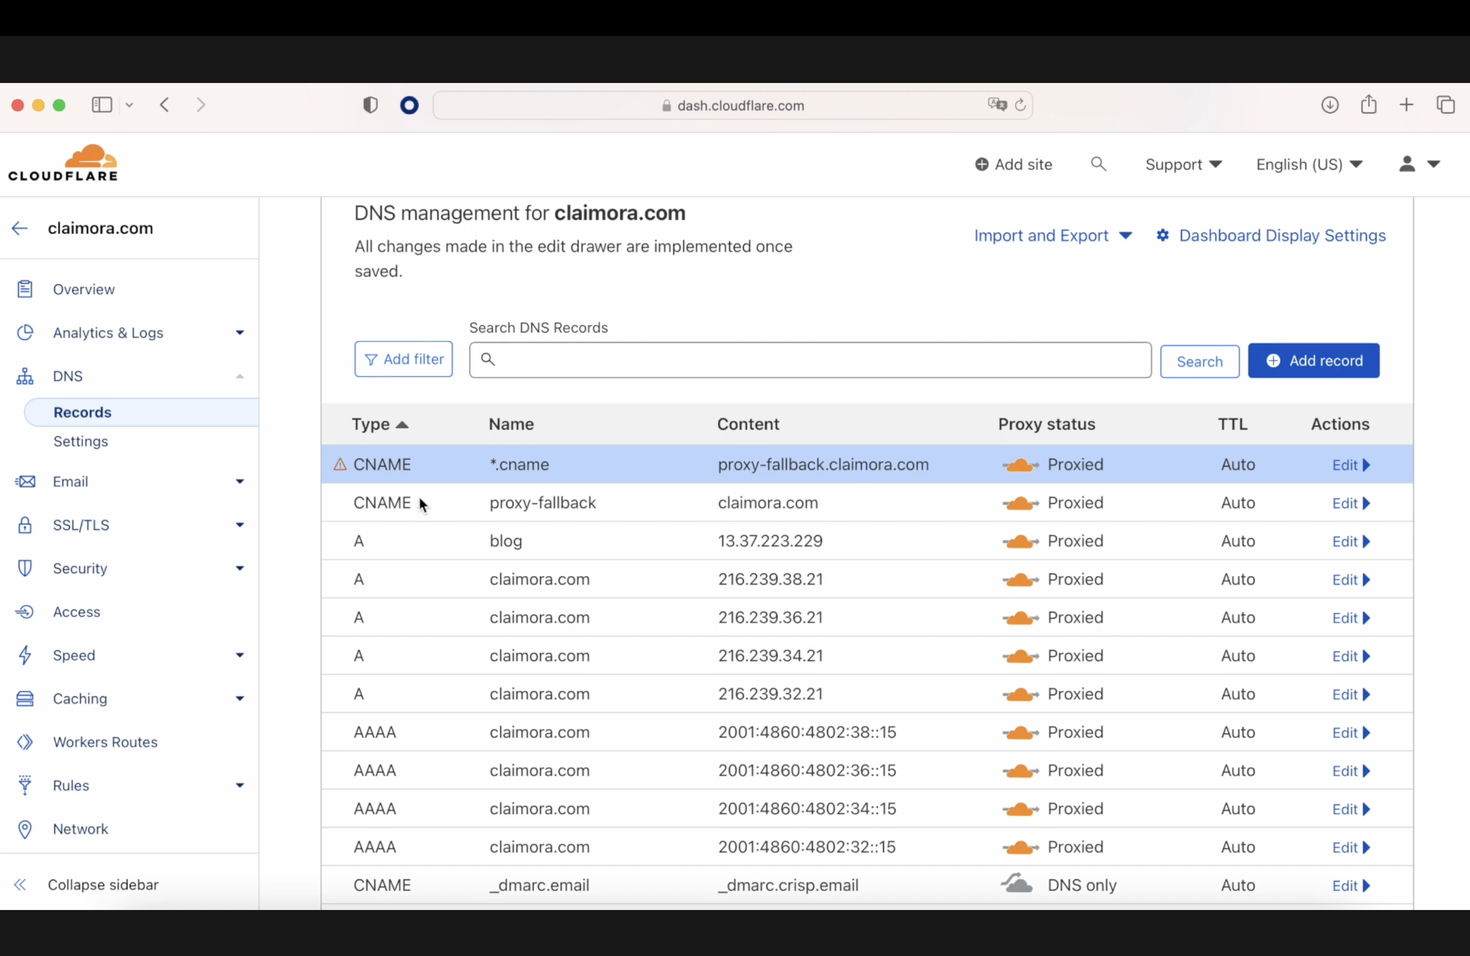
Now, in Cloudflare, we need to set up the DNS, and for that, we need to create two rules.
The first one should be a CNAME or an A pointing to the final destination. In our case, it is going to be a CNAME pointing from proxy-fallback to our claimora URL. And it is important to name it proxy-fallback.
The second CNAME will be a wildcard to allow all the CNAMEs to point to proxy-fallback.claimora.com.
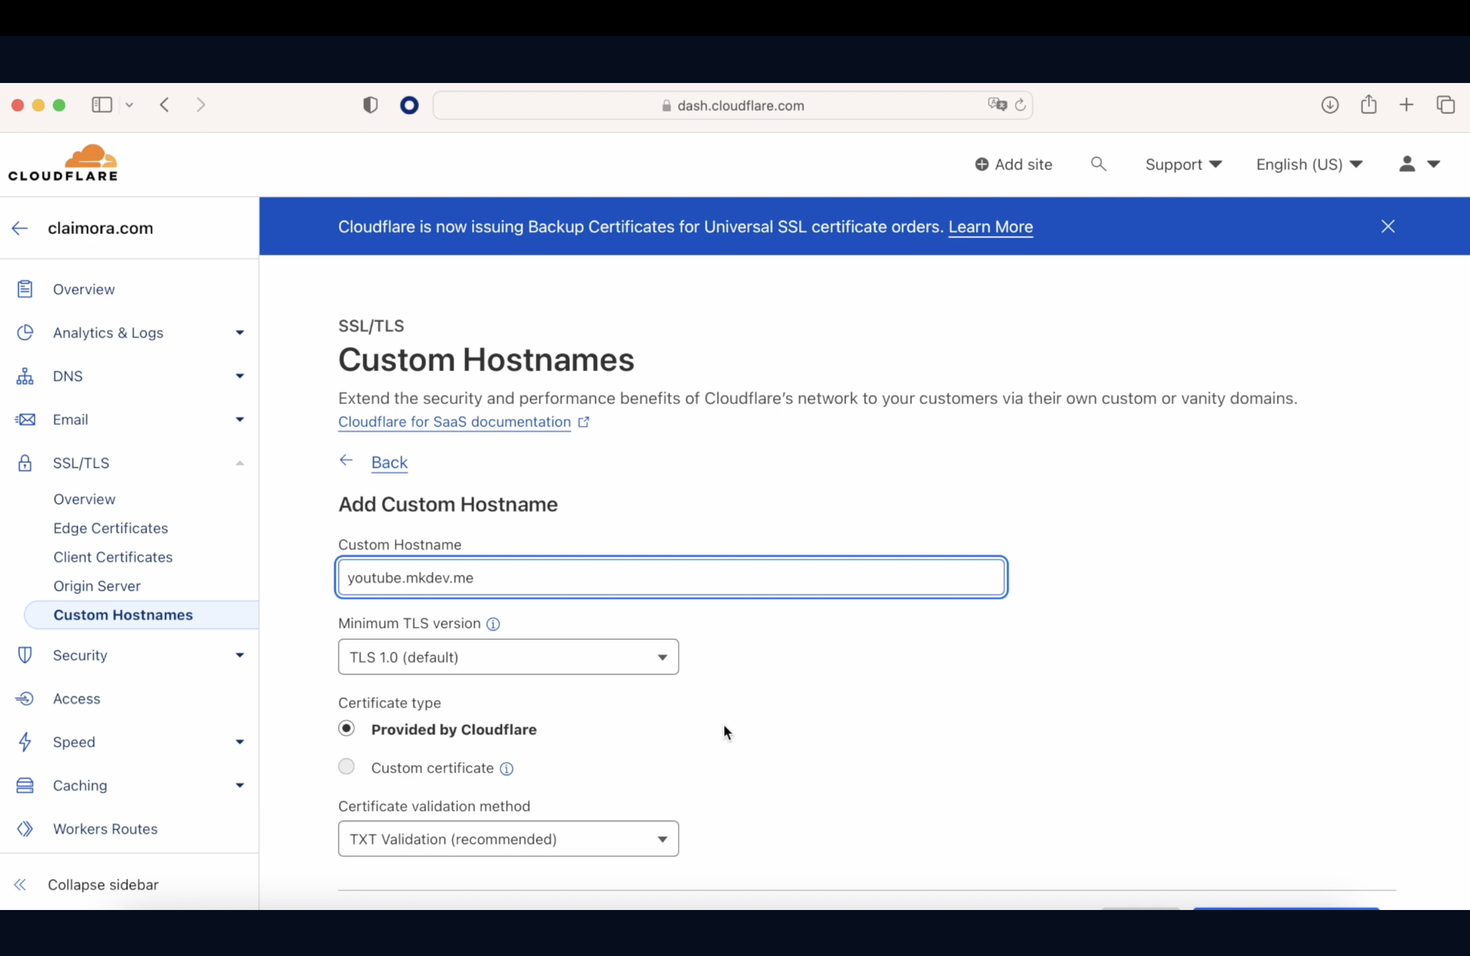
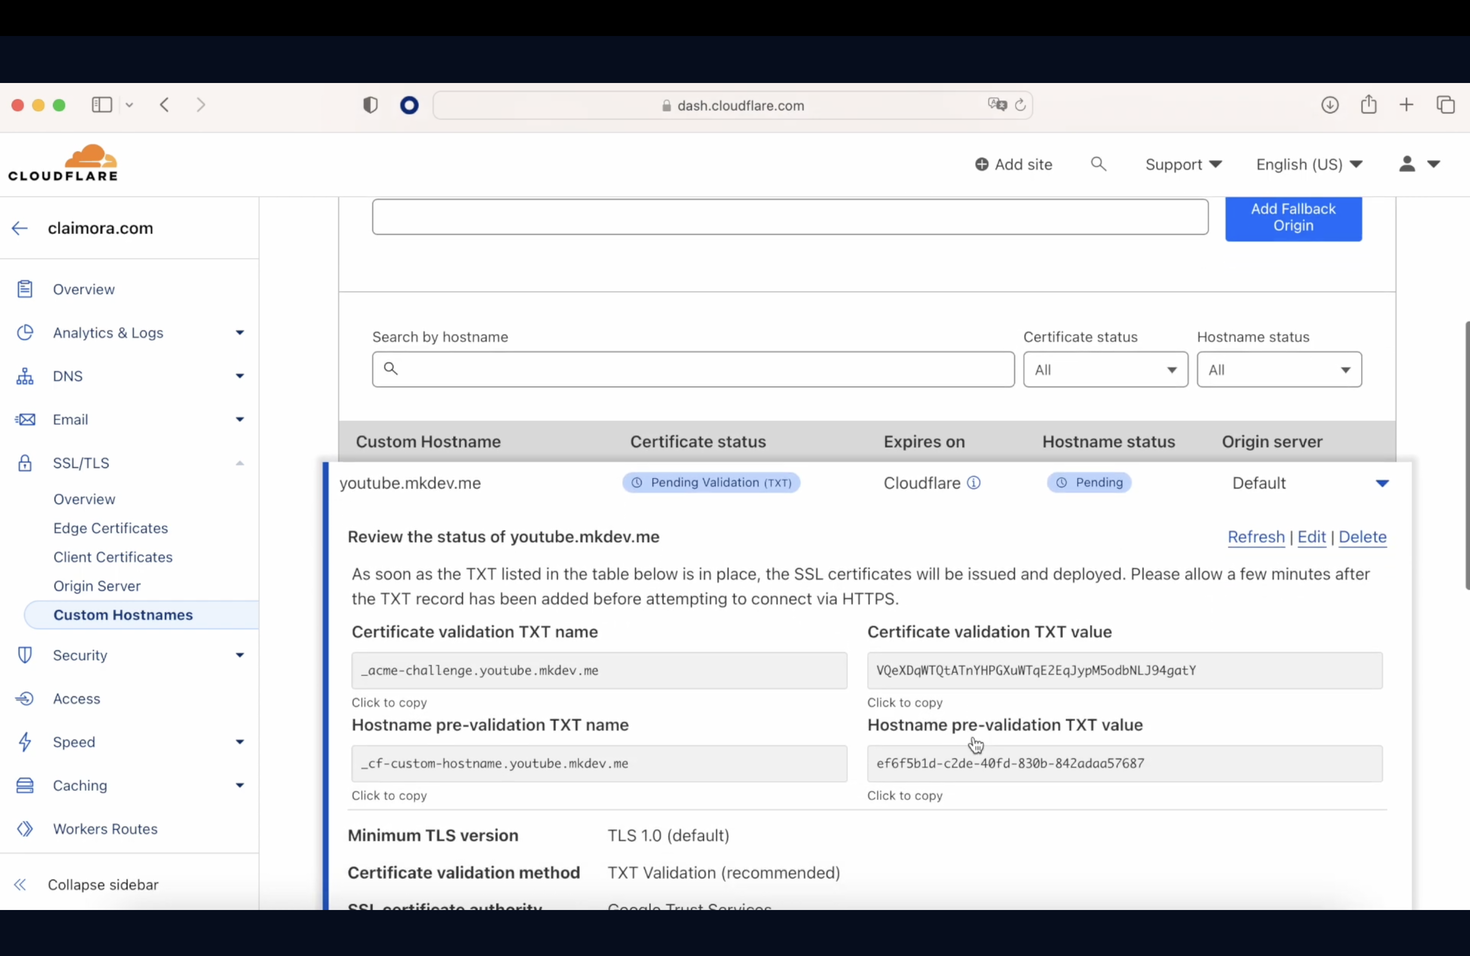
Now that this is done, we need to create a component called Custom Hostname, where we are going to reference the CNAME entry created previously in Route 53.
So, here we are going to create a Custom hostname called YouTube.mkdev.me that will point later to Claimora.com
As you can see, this component is telling us that we need to add two TXT entries in our Route 53 to be able to work. As soon as this is done and we wait a while, everything will be green.
And now, if we go to YouTube.mkdev.me, we will be redirected to Claimora.com, and the fantastic thing is that the SSL certificate is valid.
Now, imagine that you have all those steps automated, and your customers only need to add the CNAME and the two TXT entries in their DNS, and everything will be set up.
Here' the same article in video form for your convenience:
