Getting started with AWS Cost Optimization - 6 steps to get the cloud bill under control

AWS costs are confusing. They are so confusing, that even just to start analyzing them you need to perform many extra steps. Let's look at the very first things every company must do in order to start controlling and, potentially, optimizing the cloud bill in AWS.
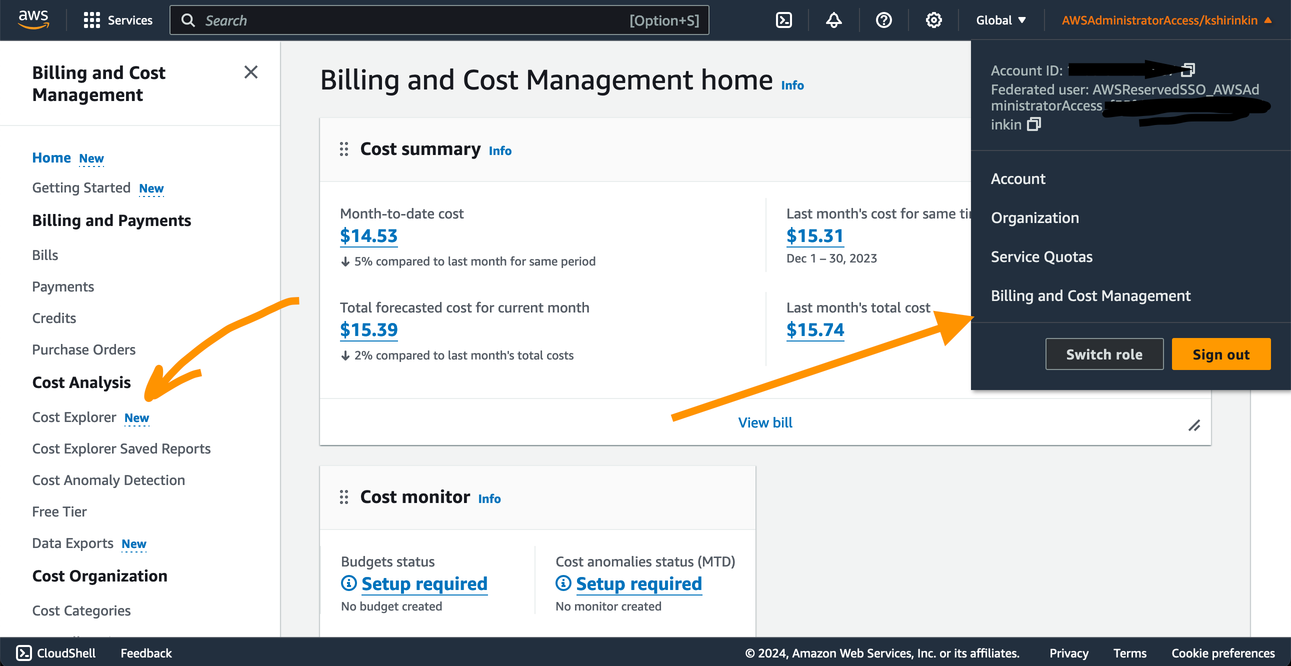
Step 1: Enable AWS Cost Explorer
It might sound crazy, but AWS's tool to analyze your costs is not enabled by default. To enable Cost Explorer, you need to go to Billing and Cost Management part of the AWS Management Console, and then click on Cost Explorer in the Cost Analysis section of the sidebar. That's it! In 24 hours or less you can come back and see the data.
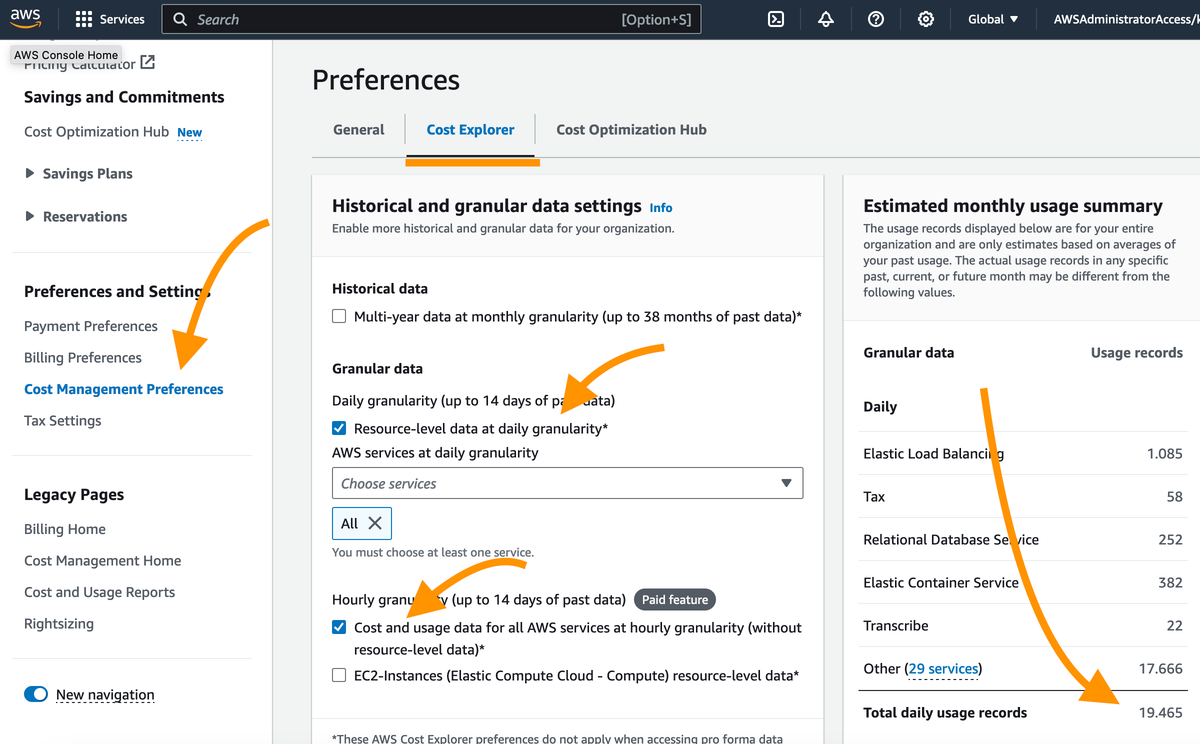
Step 2: Enable per-hour and per-resource granularity
If you are doing your cloud infrastructure correctly, your cloud costs are probably elastic and change depending on the load and time of the day. Default Cost Explorer granularity is daily. The next step you should do is to enable hourly data. The way you do it is:
Go to
Cost Management PreferencesGo to
Cost ExplorertabEnable
Hourly granularityandResource-level data at daily granularity
Note that both of these options are paid and the price depends on how many resources you have in your AWS Organization. If you have a small infra, you won't notice this cost. And if you have a big infra, then this small fee will be totally worth it.
Step 3: Enable AWS Cost Optimization Hub
Next feature to activate is free. We are going to ask AWS to help us with some cost optimization recommendations. AWS Cost Optimization Hub is a new service, released in 2023, that helps exactly with that.
Go to Cost Management Preferences → Cost Optimization Hub and enable it, for all member accounts. You can also enable it from the Cost Optimization Hub sub-menu directly, because AWS just can't offer one simple way of doing anything.
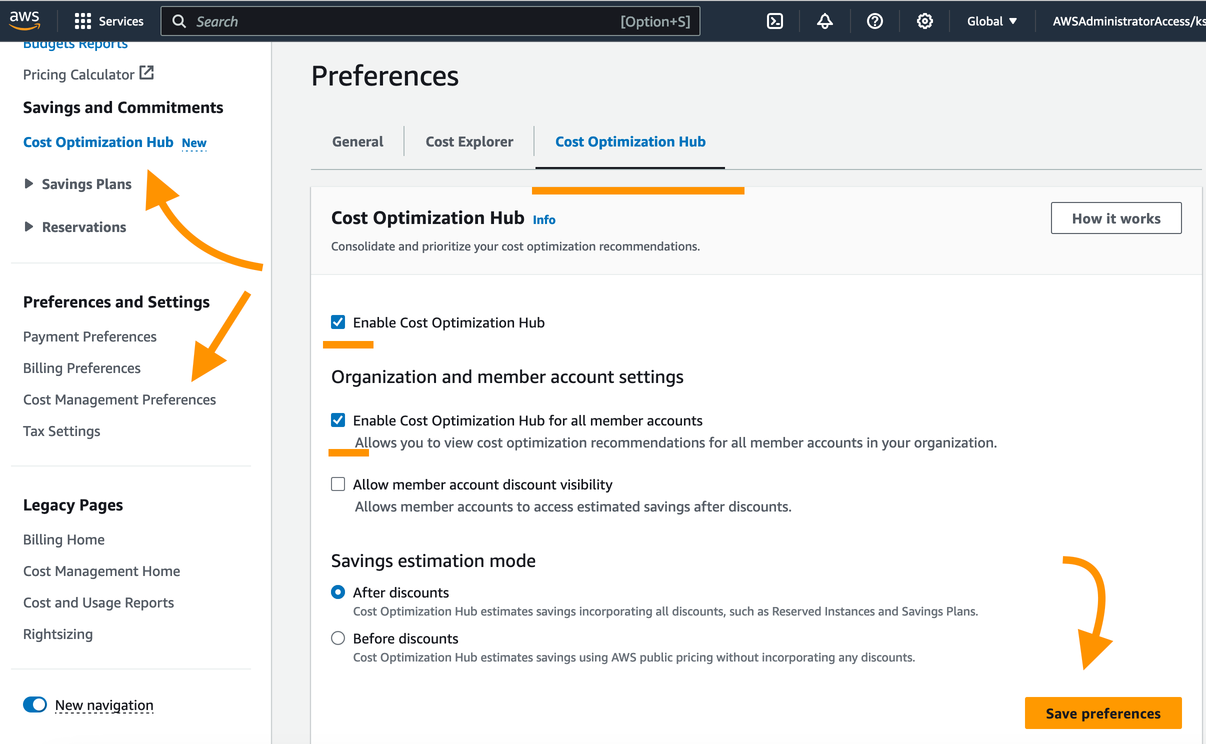
You will need to wait a bit till Cost Optimization Hub starts offering any useful data.
Step 4: Activate AWS Compute Optimizer
AWS Compute Optimizer helps with rightsizing your compute and storage resources, and you also need to activate it yourself. Ideally, activate it for all accounts in your AWS Organization - you can do that centrally in the management account of your Org.

At this point, you have activated all the important tools and services that provide the data and tips on AWS Cost optimization. This data alone is not enough, especially if you don't quite know yet how much your infrastructure will cost you. To avoid accidentally paying too much money, you need two do 2 more things.
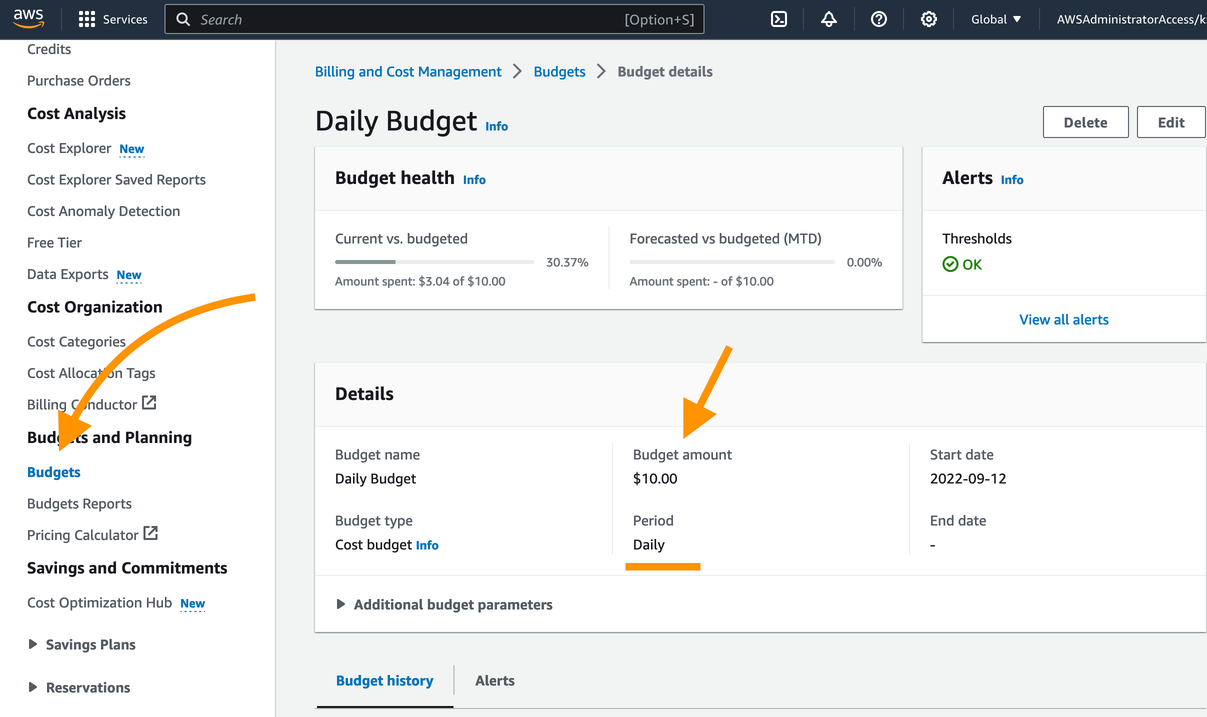
Step 5: Create AWS Budget
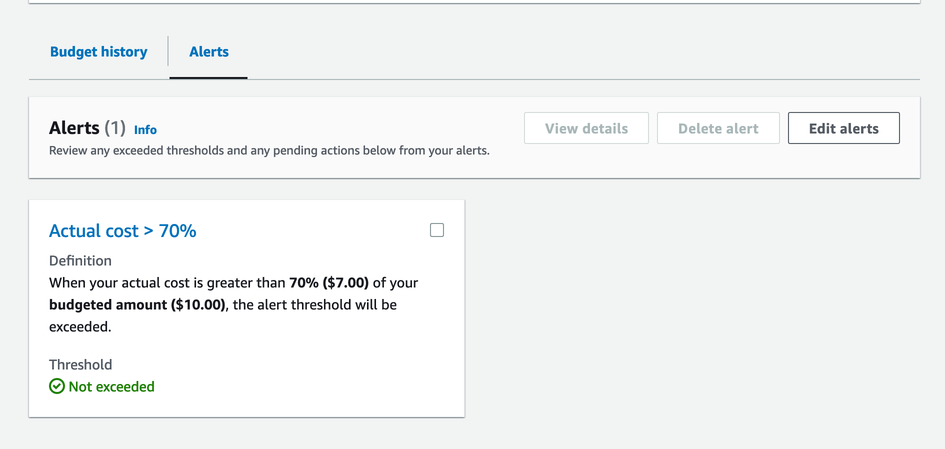
AWS Budgets allow you to configure how much you want to spend per day or per month, and then get an email notification in case you breach that budget. For new setups, we recommend setting at least some simple daily budget with the approximate amount you want to pay. For the bigger cloud setups, configuring those budgets requires more work and planning - something we help with during our In-Depth AWS Audit and Assessment.
Here is an example budget that you can configure - $10 per day, with an as soon as we consume 70% of this budget:
Step 6: Configure AWS Cost Anomaly Detection
AWS Budgets help you to get notified if you breach a pre-defined budget threshold. What AWS Cost Anomaly Detection does is notifies you if something unusual (anomaly) happened in the cost of a certain service. Let's say, if all of a sudden AWS S3 costs $50 more than usual, it will send you an alert.
You can find this feature under Cost Analysis section in the Billing and Cost Management area:
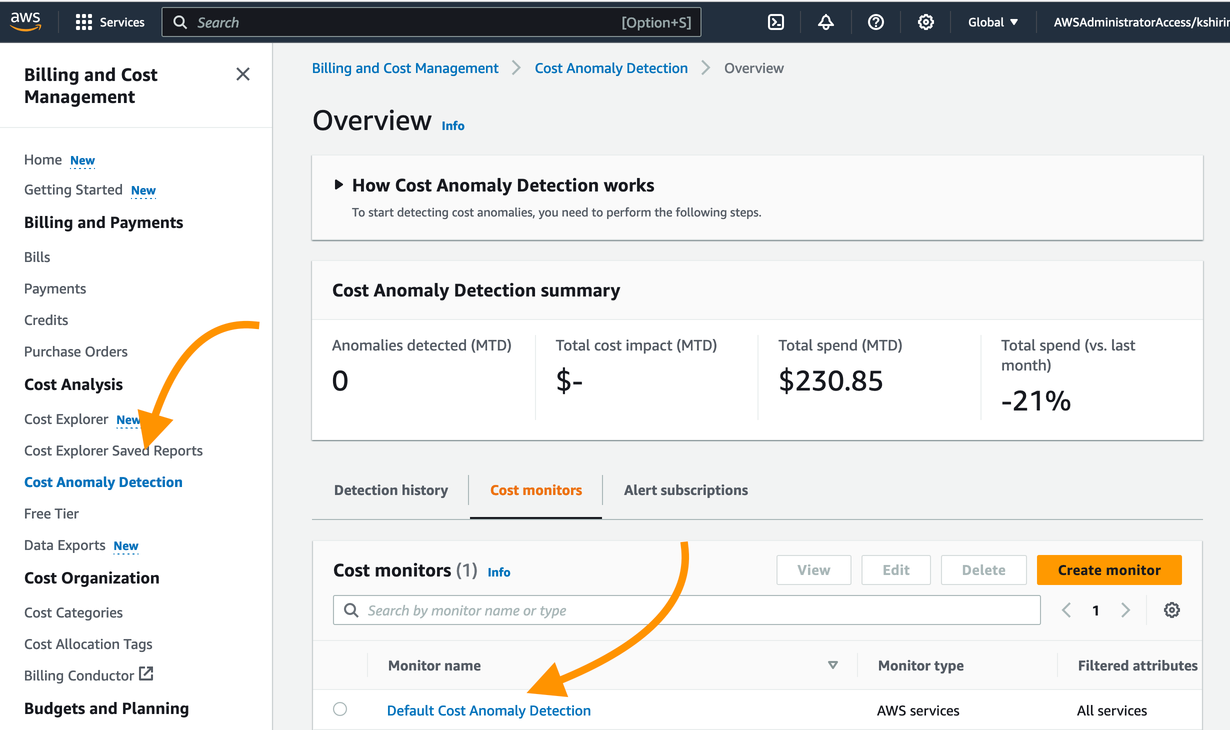
The simple Cost Monitor you can start with is the following:
Monitor type: "AWS Services"
Filtered attributes: "All services"
Threshold: $10
Daily summaries
Of course, $10 is something that works for the very small setup, adjust accordingly to your scale
That's it! With this 6 steps, you will have a foundation of AWS Cost monitoring and optimization. You will be able to get all the data around each service and sub-service that you are using, plus AWS itself will give you tips on cost optimization. Most importantly, you will get notified as soon as you spend too much money.
Of course, those steps are just the first steps. Optimizing an existing AWS infrastructure is a lot of work, and especially the cost part can be very confusing. From our experience, any AWS setup can be optimized to cost at least 25% less, while maintaining or improving availability, scalability and reliability of your applications.
We help our customers to achieve just that, by conducting a Free Cloud Cost Audit. Check out how we helped the German market leader of digital door locks to cut their costs by 40%: Trimming KIWI’s Cloud Costs: Uncovering Savings in AWS.
Learn more about the audit and how we can help here, or fill in the application for right away:
Video tutorial on AWS Cost Optimization
We also have a video, where I walk you through all of those steps! Check this out: