How to back up GKE Clusters

Hello, everyone! Today, we are going to talk about something really useful called GKE Backups. As you may know, GKE is a scalable and fully automated service for running container applications and workloads, both stateful and stateless. But what happens if your data gets corrupted, or you need to restore a snapshot of a cluster? That’s where GKE Backups come in.
What can we do? The first step is to activate GKE Backups on your GKE cluster. After that, navigate to the Backup for GKE section. Here, you will find two main options: creating a backup plan and creating a restore plan. With the first option, as you can imagine, we will create a backup or schedule backups—daily, early, or whatever frequency you prefer—and decide what kind of backups we want.
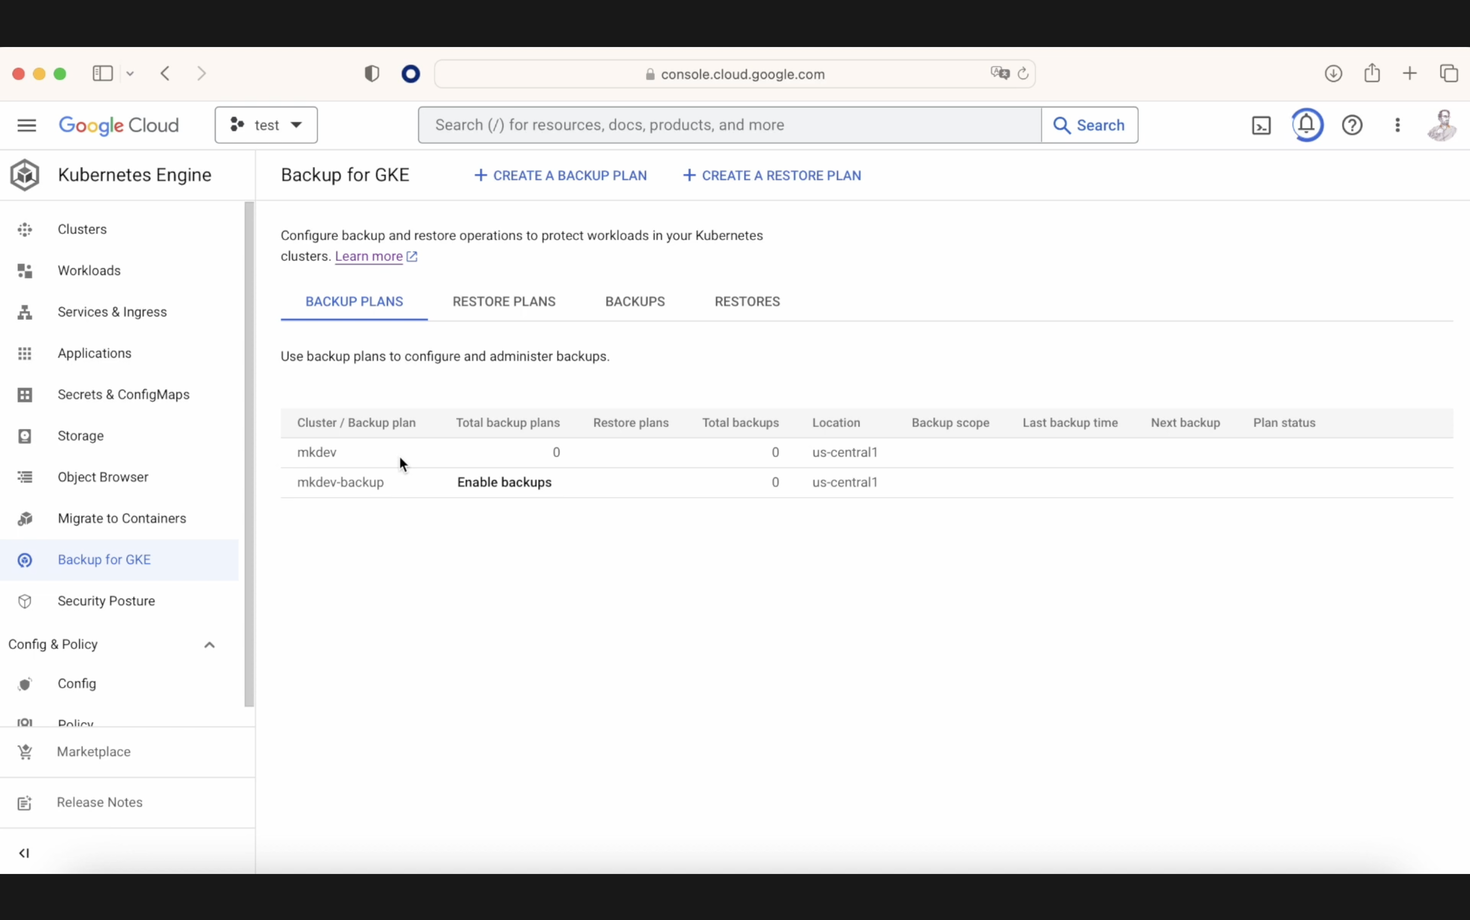
As you might guess, the second option involves creating a plan to later restore this backup. Click on "create a backup plan."
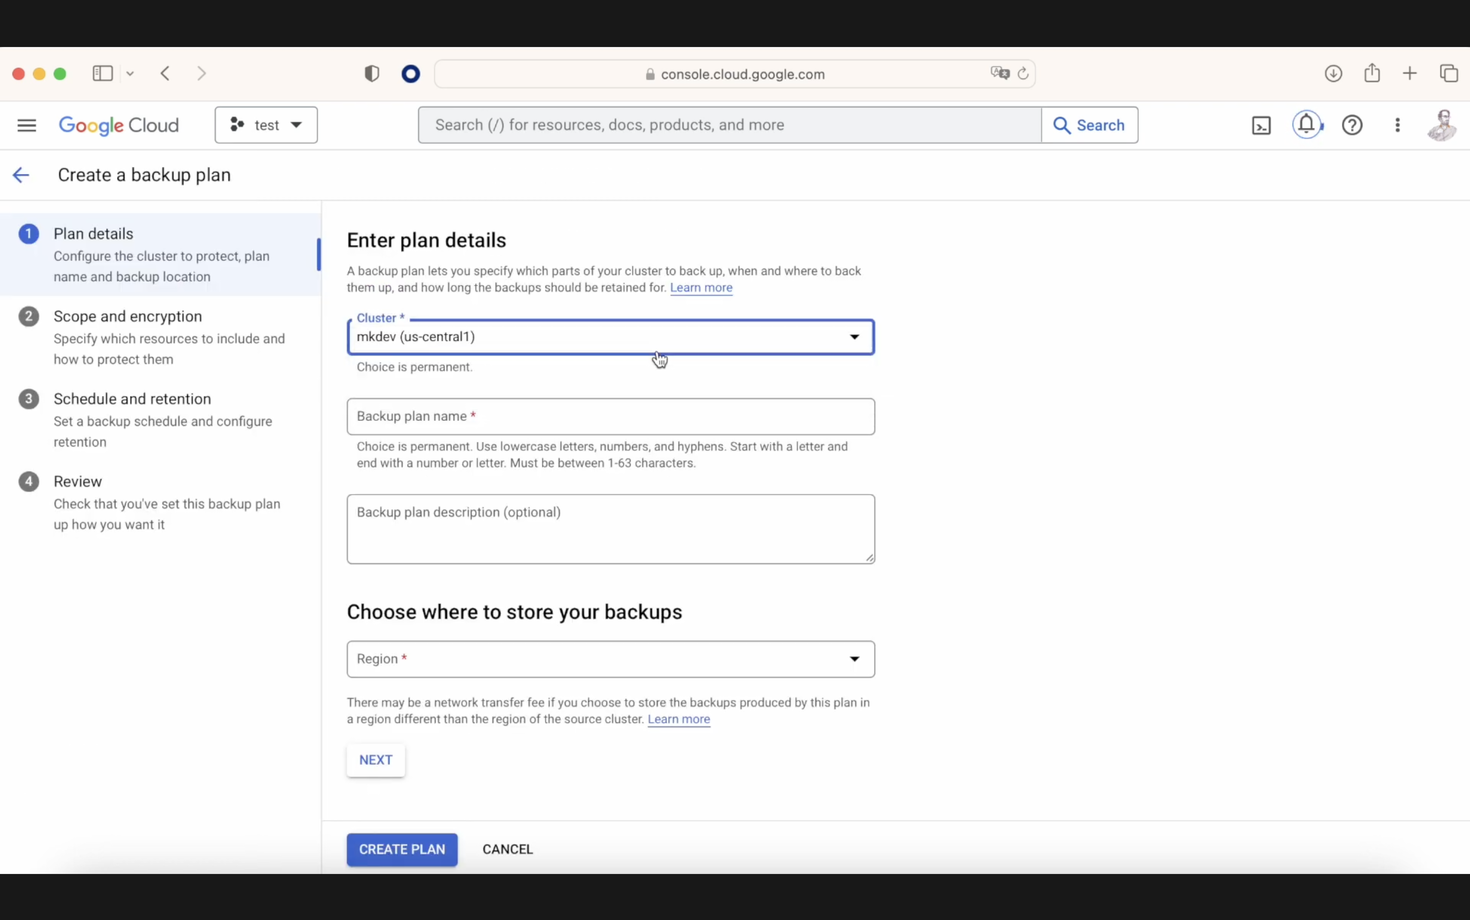
You will see various options: choosing the cluster to execute the backup, naming the backup, and selecting the region for the backup—our choice will be US Central 1. Moving to the second option, you can back up on an internal cluster. Imagine if someone removes our cluster; this is where it becomes crucial. For example, you can select a namespace within this backup, but remember, if you want to restore this namespace, it should not already exist in the cluster. Therefore, it needs to be empty—the same applies to the cluster.
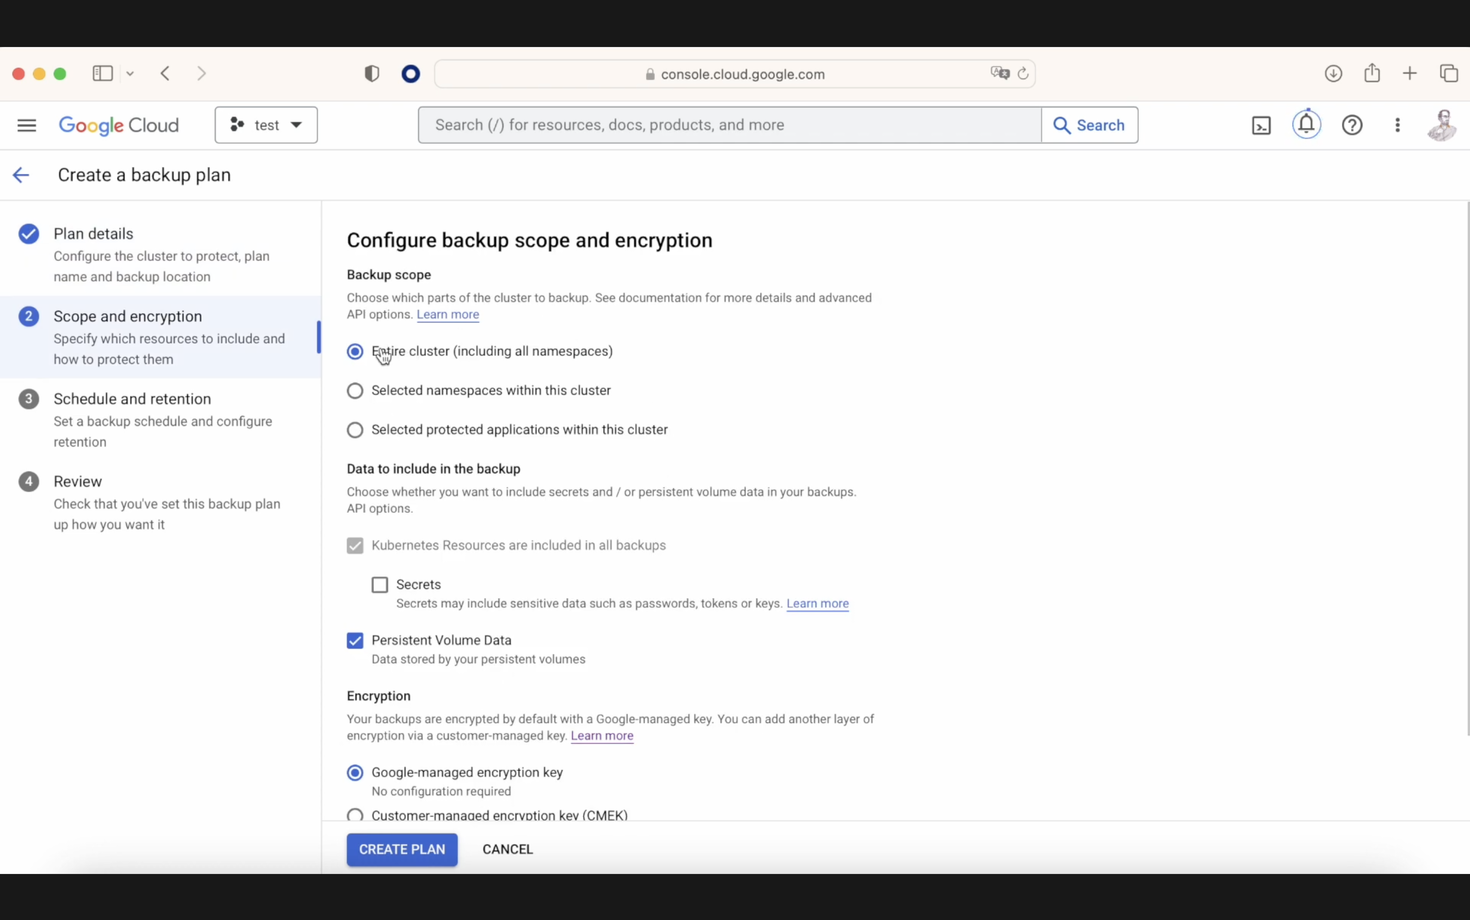
There is another option called "persistent volume data," which allows saving all persistent data. This is particularly interesting because it includes saving all the CRD plus all the contained data. The backup schedule is managed via a cron job, and once our backup plan is finalized, we proceed to execute it in our console.
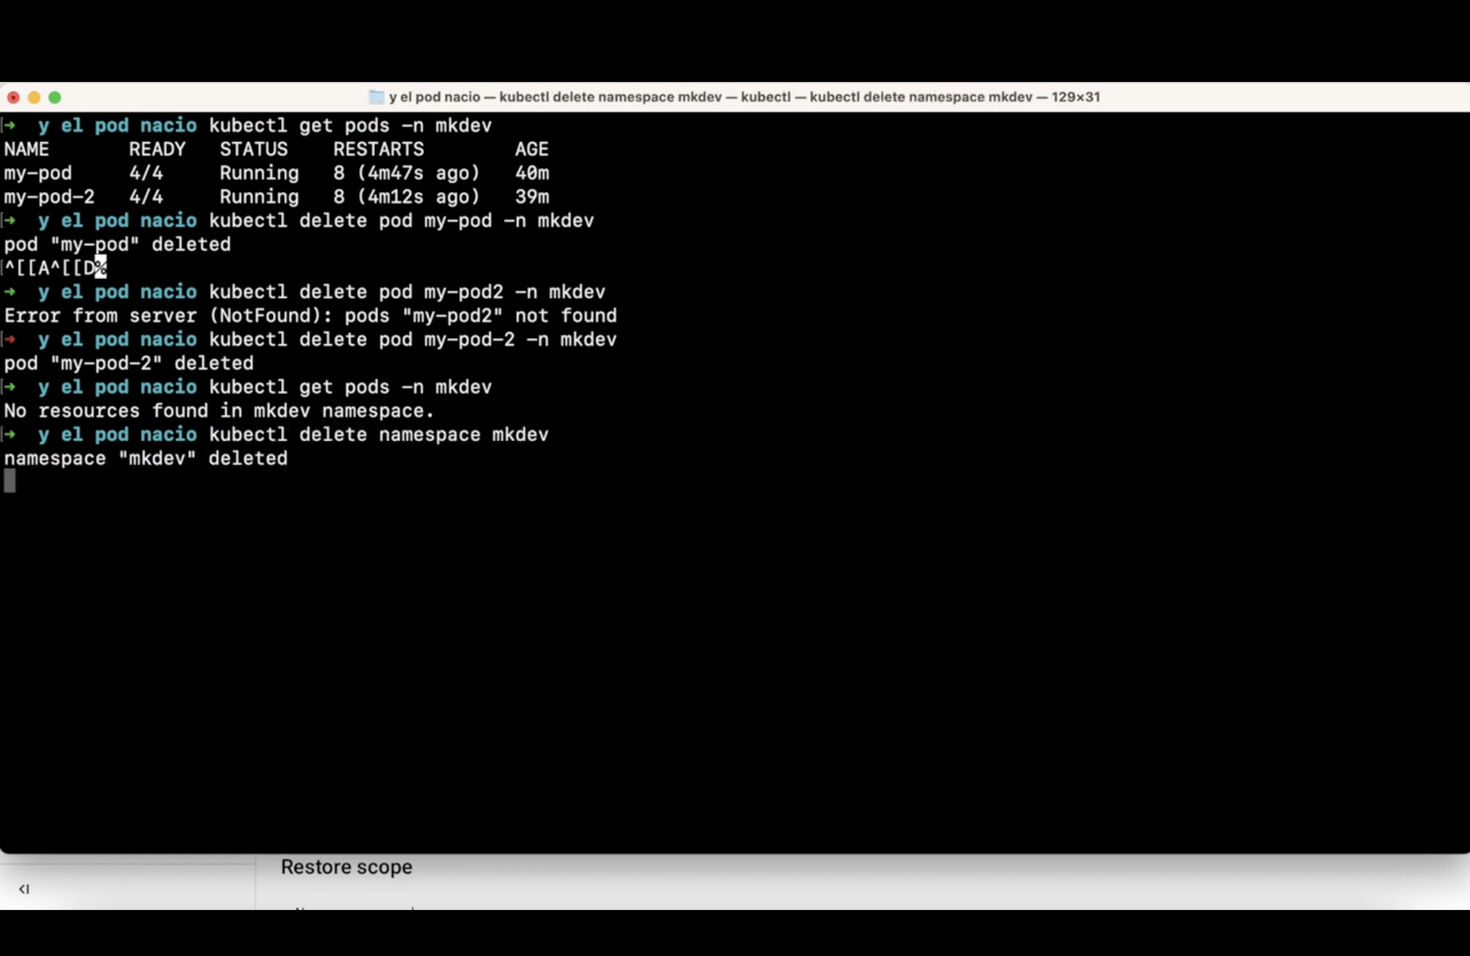
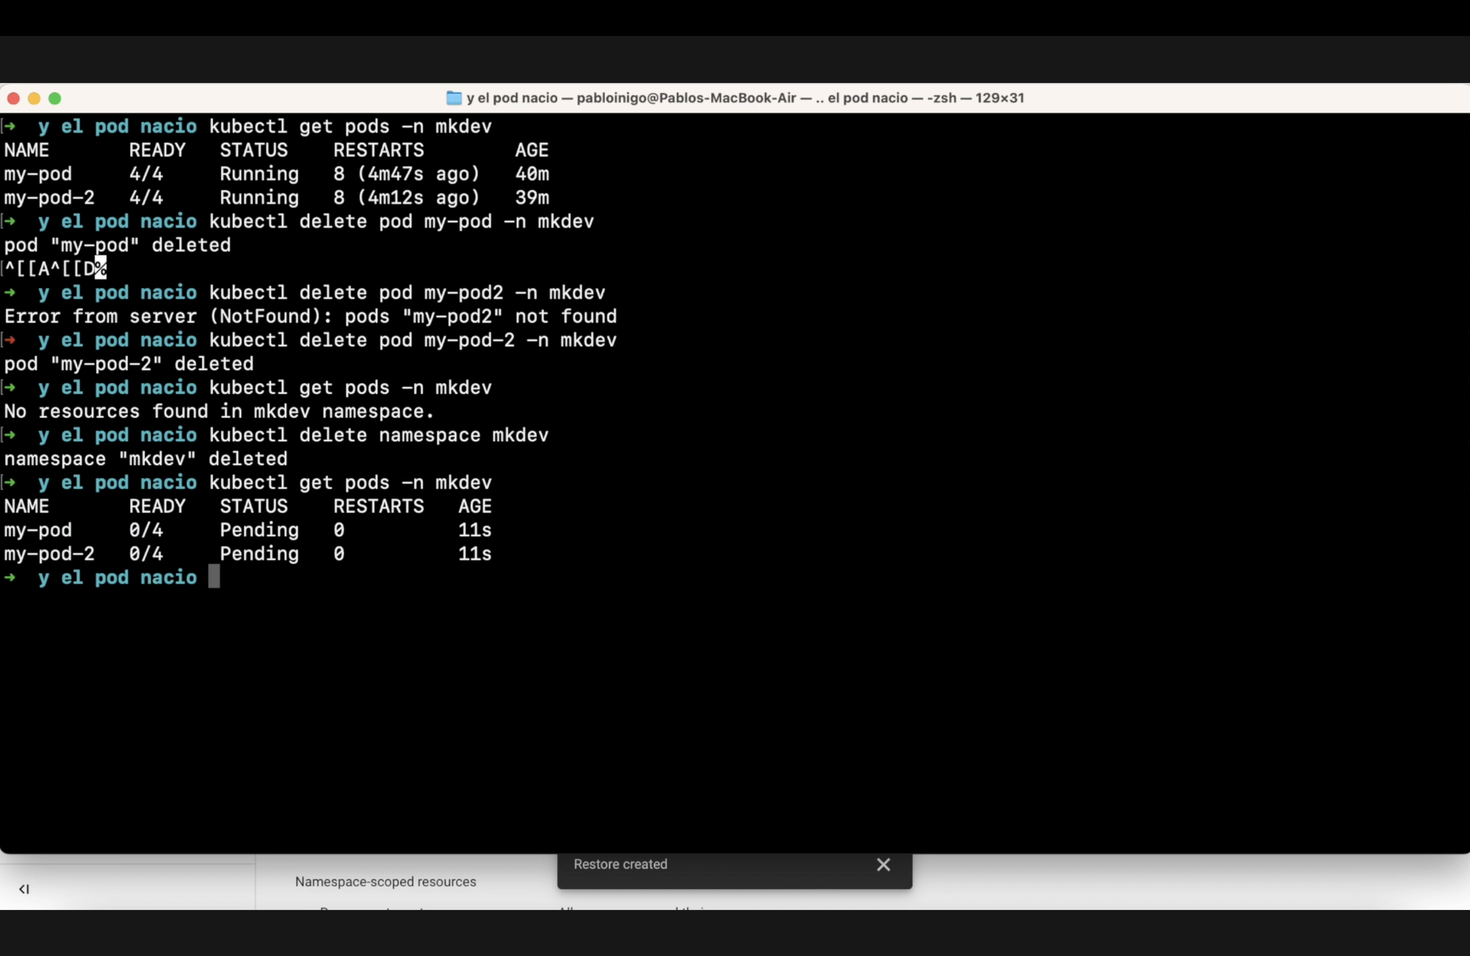
Currently, our cluster is running two pods, "my-pod" and "my-pod-2." We will remove these pods as demonstrated on the screen with the commands kubectl delete pod my-pod and kubectl delete pod my-pod-2. Next, we need to delete the namespace using kubectl delete namespace mkdev.
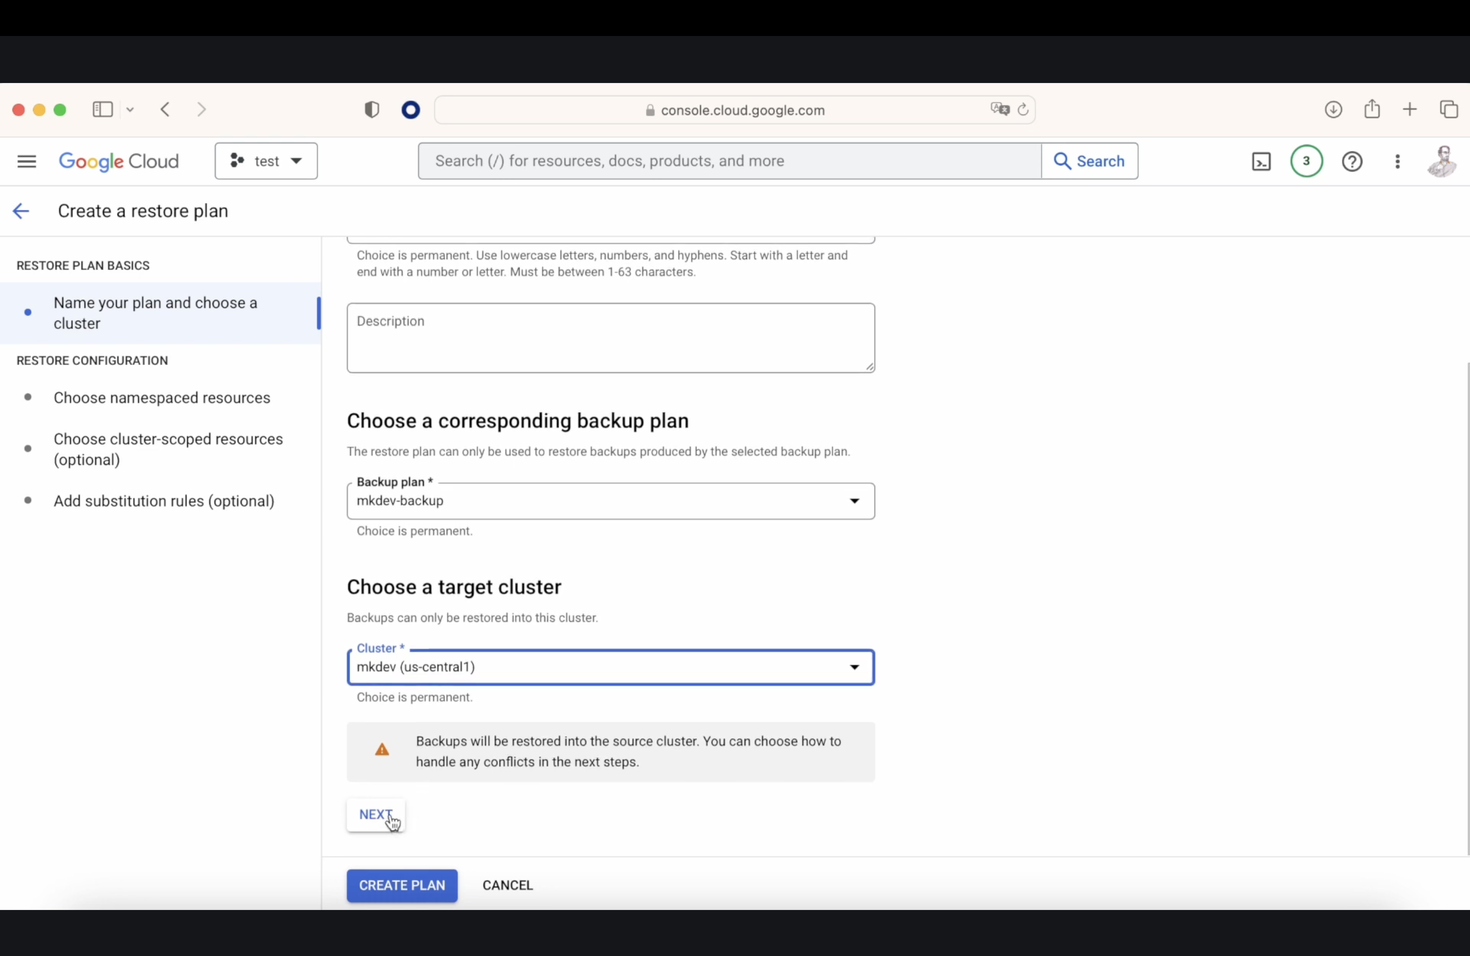
Next, we create a restore plan. Like before, click on "restore plan," name your restore plan, select the backup plan you want to restore from, click on "restore backup," and choose a target. This part is fascinating because you can choose a different cluster to restore the plan that was created in a previous cluster. For demonstration, we will choose "mkdev"
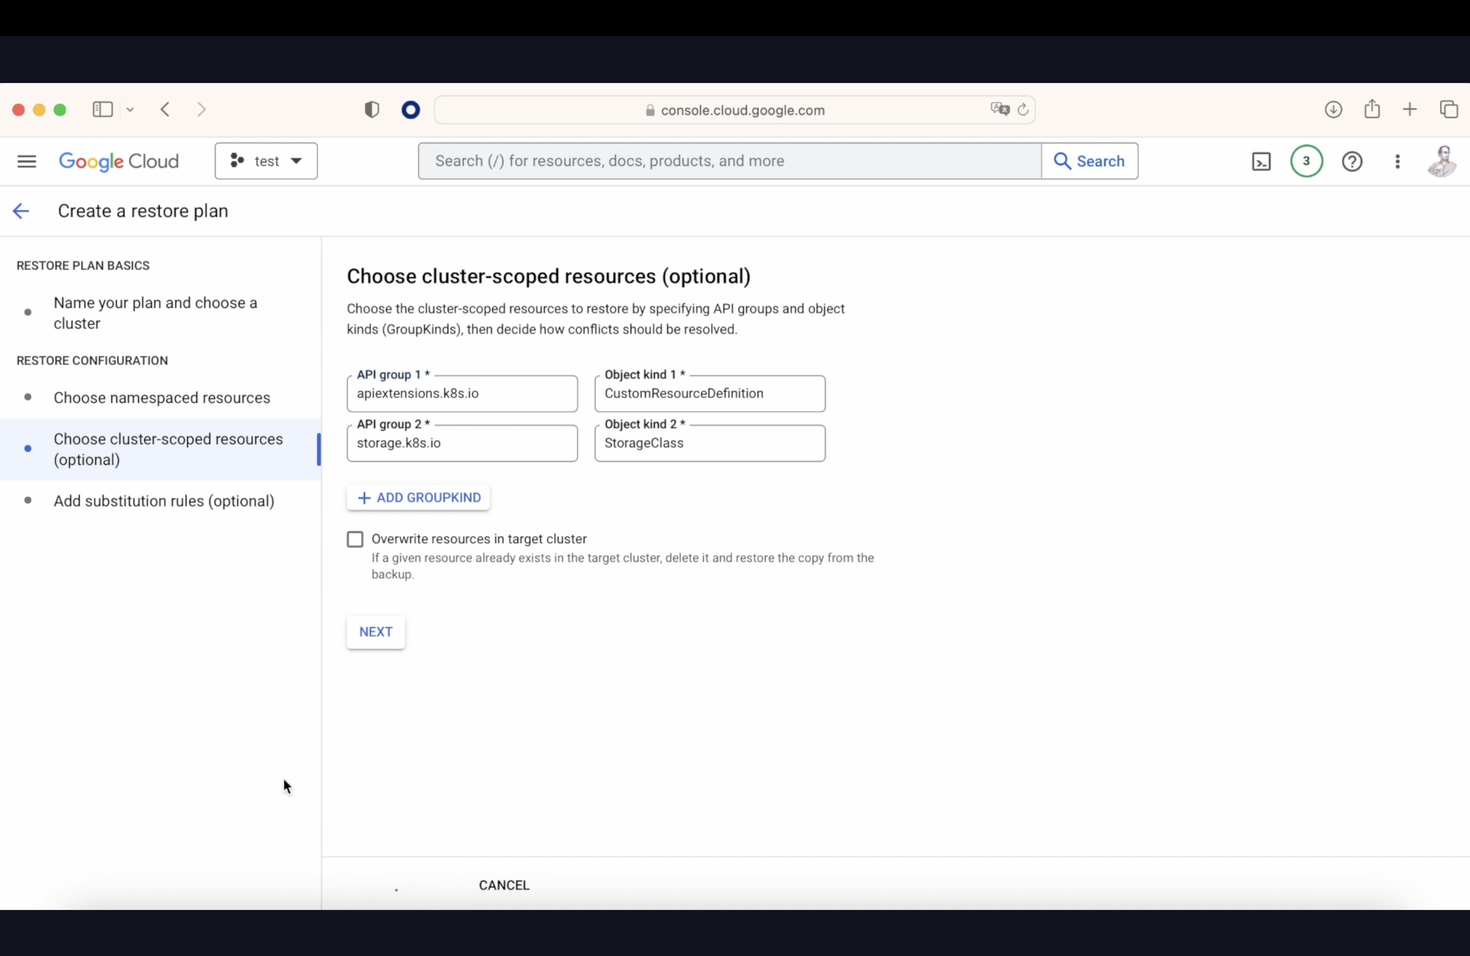
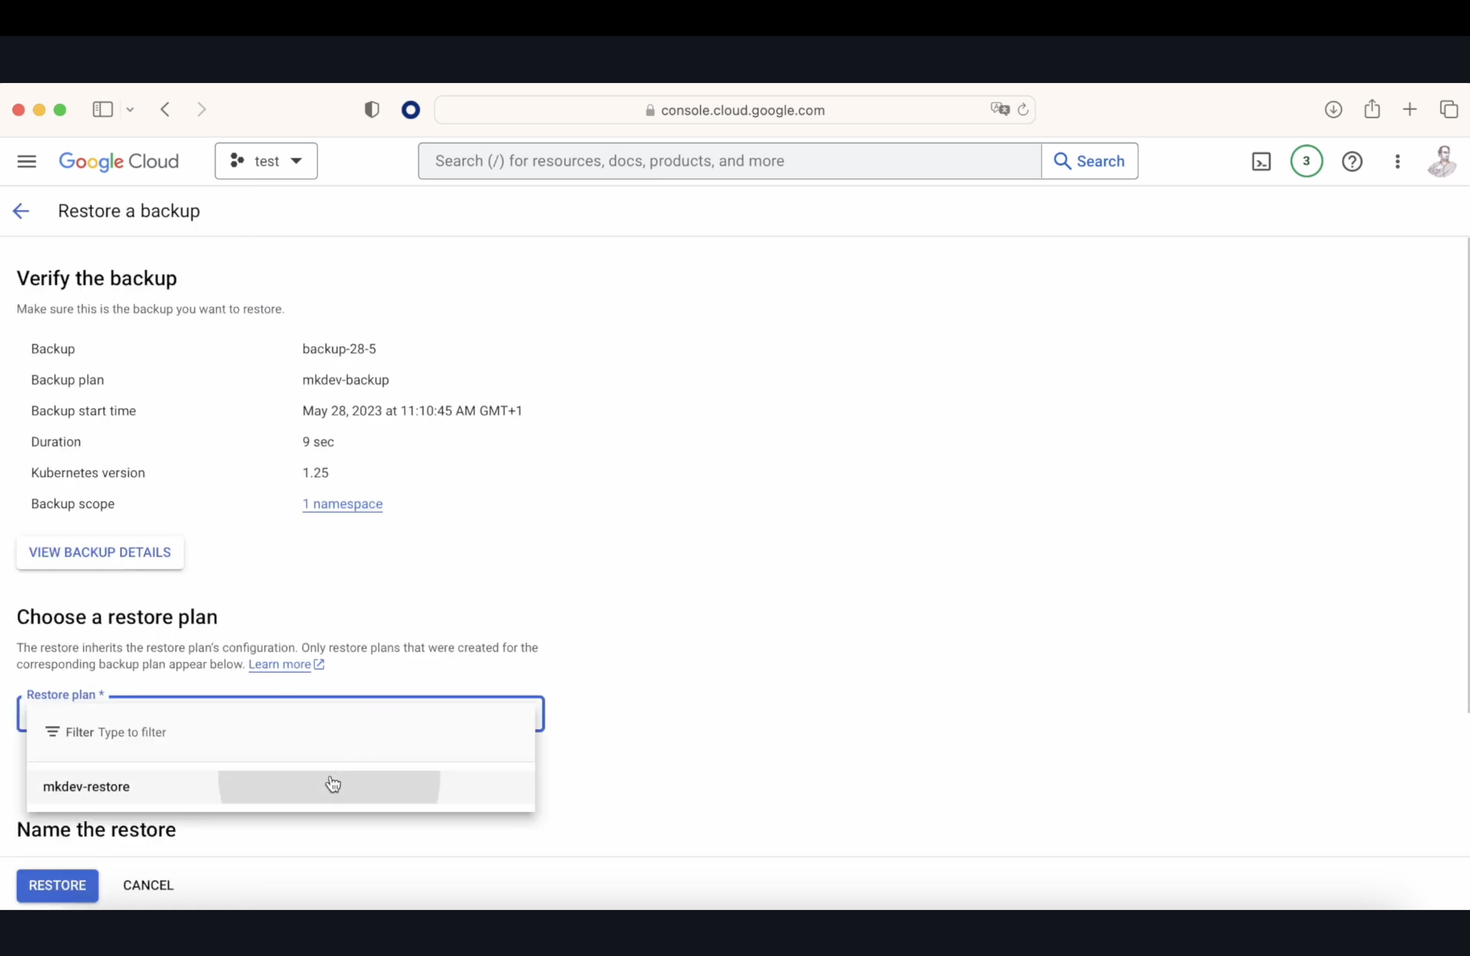
We now have various options, including restoring only a selected namespace and many other choices. After setting all parameters, we finalize the restore plan. When we go to the backups section later, we’ll see an option that says "set up a restore." Upon selecting it, we choose our previously created restore plan, name the restore, and execute it. After some time, if we check our console with the command kubectl get pods -n mkdev, we will see our pods.
GKE Backups are designed to capture both the clustered state, which includes descriptions of Kubernetes resources, and volume backups of the corresponding PVCs. However, it's important to note that GKE Backup does not save node configuration, node pools, enabled features within our cluster, the actual container image, configuration information, or the state of services external to the cluster, such as load balancers.
The main reasons to use GKE Backup include disaster recovery, data protection (ensuring all your GitHub data and disk contents are backed up), and compliance with industry regulations.
I hope you found this overview helpful and are now encouraged to set up a GKE backup!
Here' the same article in video form for your convenience: