How to create an ALB in ECS fargate

Today we are going to see how to create an application load banaler connected to our lovely ECS fargate, and what should be simple is not so simple because always there is a hidden trick.
The main idea with an Application Load balancer is that we are talking about Layer 7, an HTTP load balancer. In our case, we are going to start an ECS fargate service with 3 tasks connected to an application load balancer, where we will control and check that the application is up and running.
To start to run we need an application and nothing more simple than a container with a HTTPS service running inside that will open the port 80.
If we go to our AWS console and later on to ECS we can create a task definition. And here is where is the trick, we can’t create the task definition manually in our case, because we need to map a container port 80 to a host port 80and this is not possible to be done from the console, so in this case, we will have to use a JSON file where we are mapping the port.
{
  "executionRoleArn": "arn:aws:iam::596923679360:role/ecsTaskExecutionRole",
  "containerDefinitions": [
    {
      "portMappings": [
        {
          "hostPort": 80,
          "protocol": "tcp",
          "containerPort": 80
        }
      ],
      "cpu": 0,
      "environment": [],
      "memoryReservation": 128,
      "volumesFrom": [],
      "image": “httpd:2.4:”,
      "name": "web-task"
    }
  ],
  "placementConstraints": [],
  "memory": "512",
  "taskRoleArn": "arn:aws:iam::596923679360:role/ecsTaskExecutionRole",
  "family": "mkdev-Fargate",
  "requiresCompatibilities": ["FARGATE"],
  "networkMode": "awsvpc",
  "cpu": "256",
  "volumes": []
}
If we execute
aws ecs register-task-definition --cli-input-json file://fargate.json
we will create our task definition.
Our next step will be to create the application load balancer. We need the Load Balancer first because when we create the ECS fargate Service we will need to include it. Now if we go to EC2, Load balancer, create Load balancer and Application Load balancer we can start to work

We only need to give a name, internet-facing, as a listener we have port 80 that later on will be redirected.
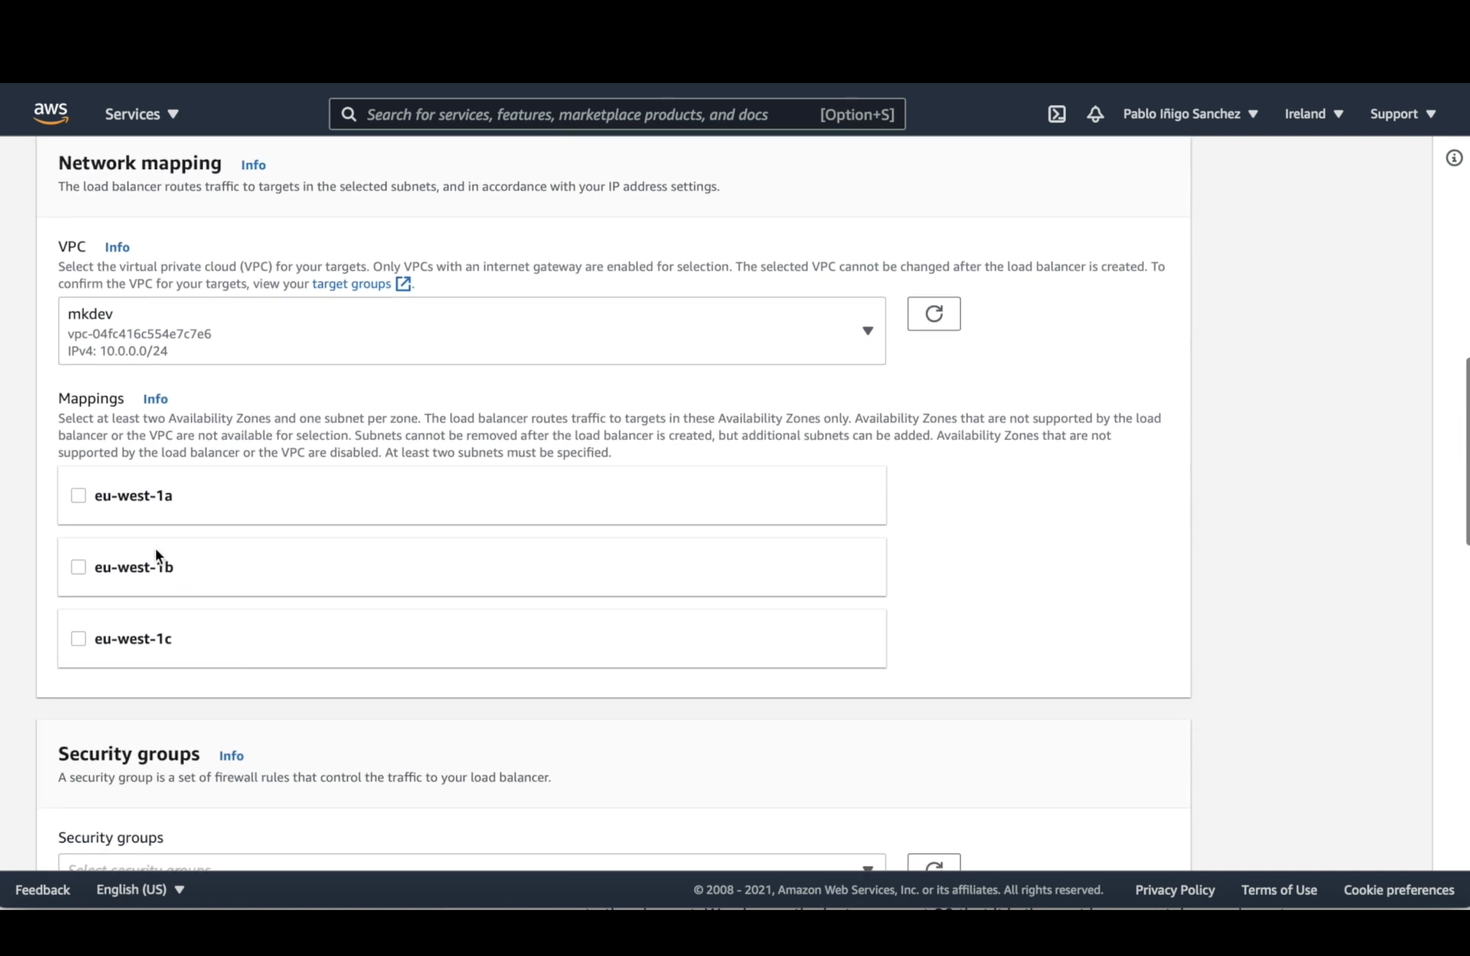
To be able to use the network mapping we need to have currently set up a VPC with 3 subnets connected to a routing table pointing to an internet gateway. As soon as this is done we can choose our 3 subnets. The next step is to connect to a security group that we will have already created that allows only access to port 80 from anywhere.

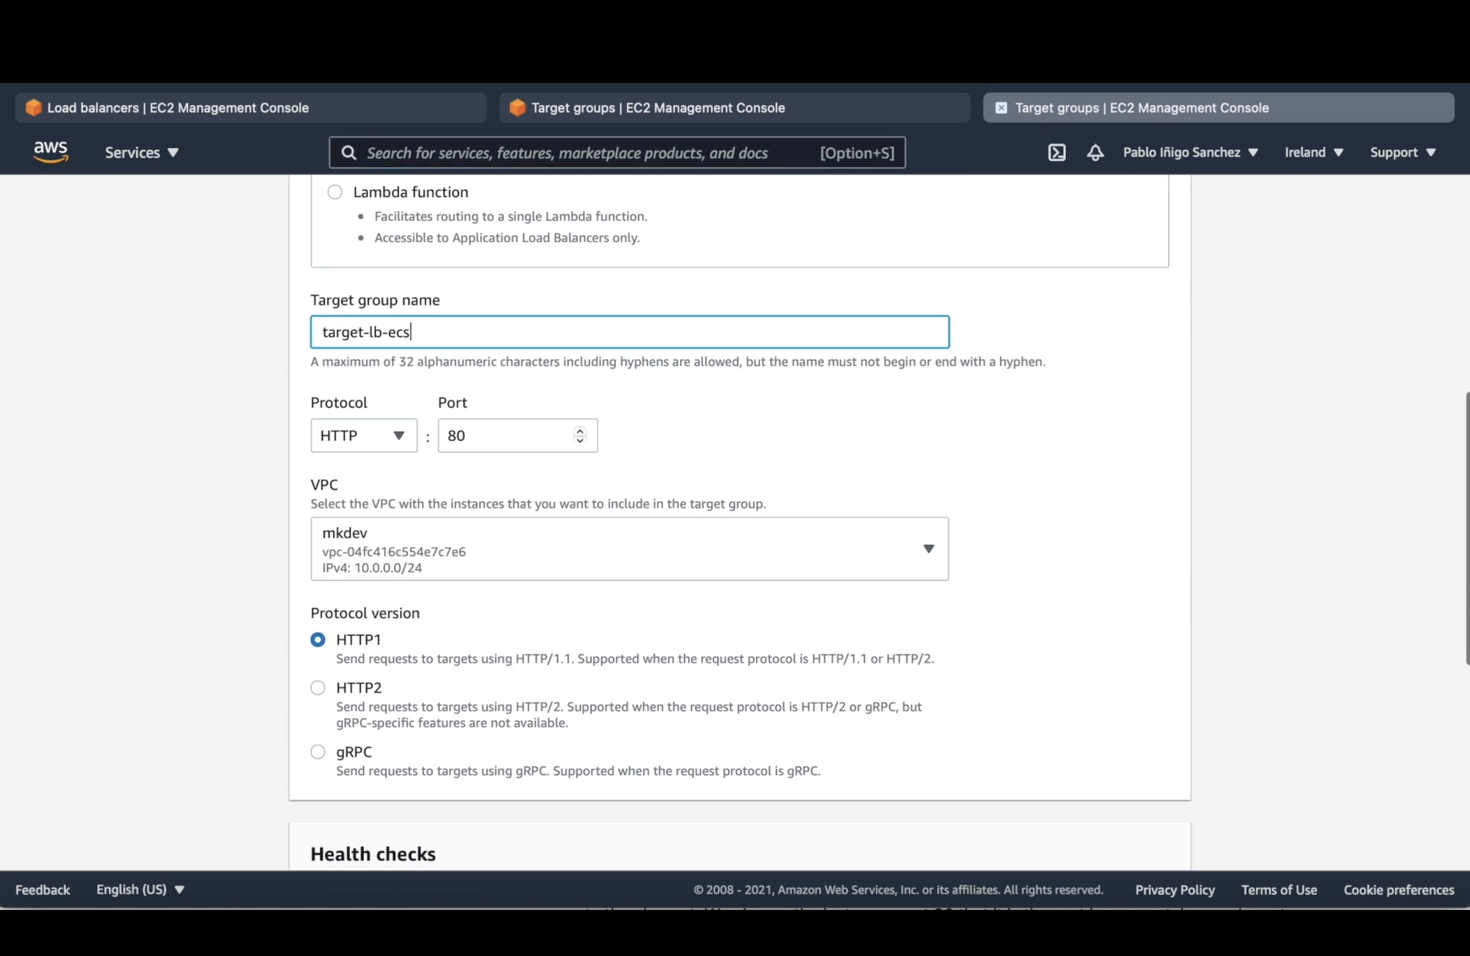
And in the listener, we will point our port 80 to a target group that we need to create by clicking on the target group. This target group won't be used later on but it is a must here. When we click on “target group” we create the element. We choose the instance, port 80 that it is the port in our container and create.
If we go back to the load balancer, we can choose our target group as a forward action we have ended. Now we can create our Load balancer.

The next step is our ECS fargate cluster, to do that we need to go back to ECS and create the cluster, giving a name.
Next one, the ECS service.
In the first screen, we choose FARGATE as launch type, our task definition created before, give a name to our service, and 3 tasks in our case.
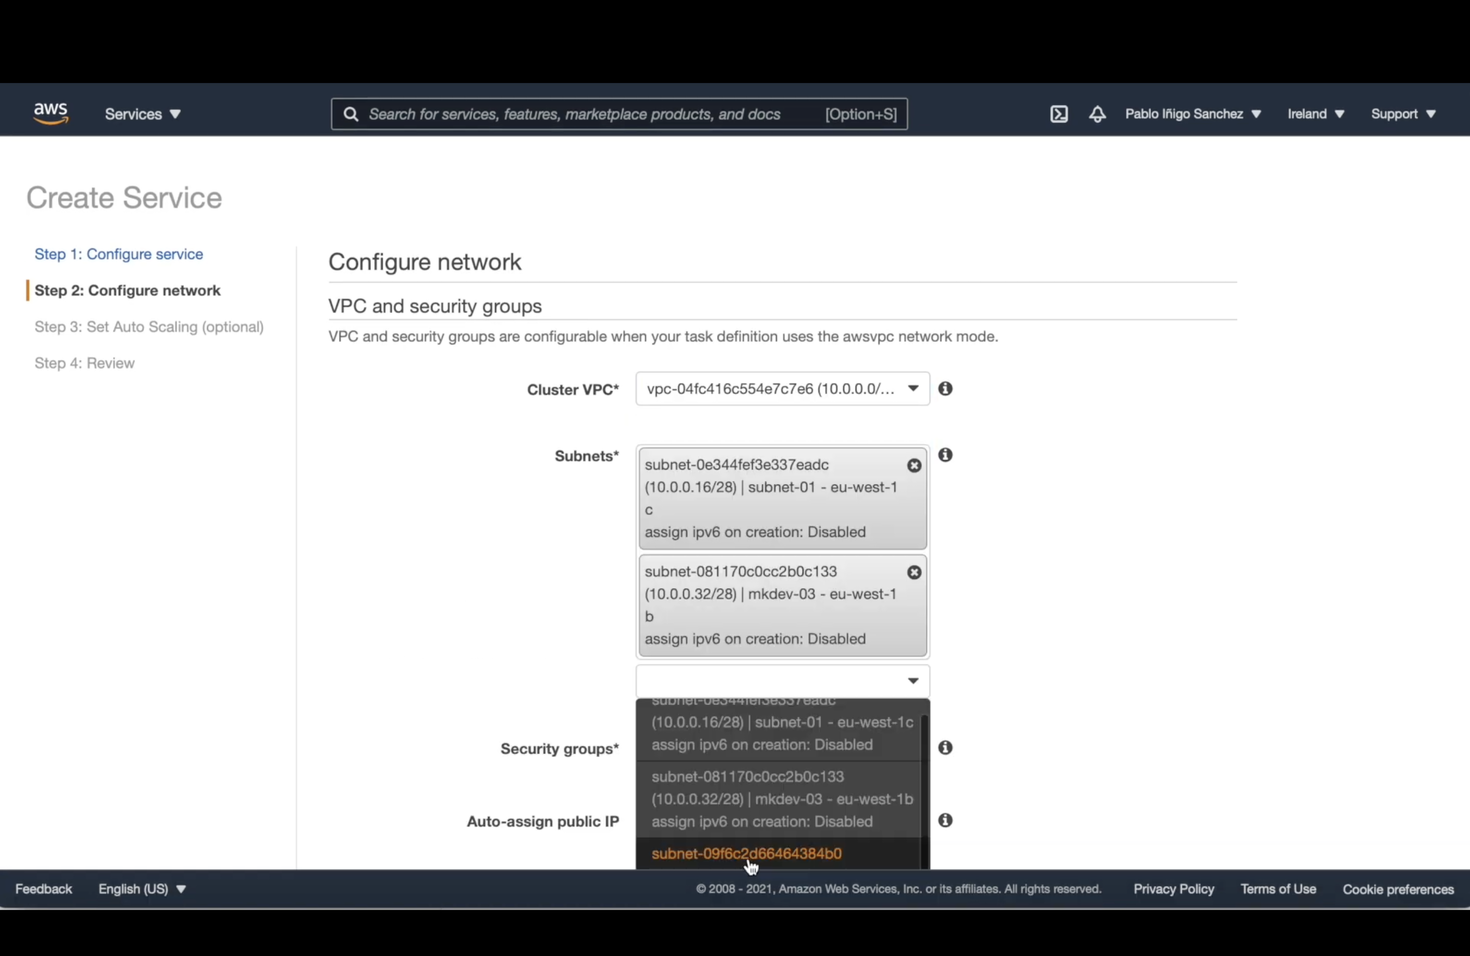
In the next window, we choose our VPC, the 3 subnets, and our security group that allows access to port 80. Now we choose the application Load balancer, and we create the connection between the container and the Load balancer because remember that the previous target group is not valid. We choose our port, target group, evaluation order and we create our service.

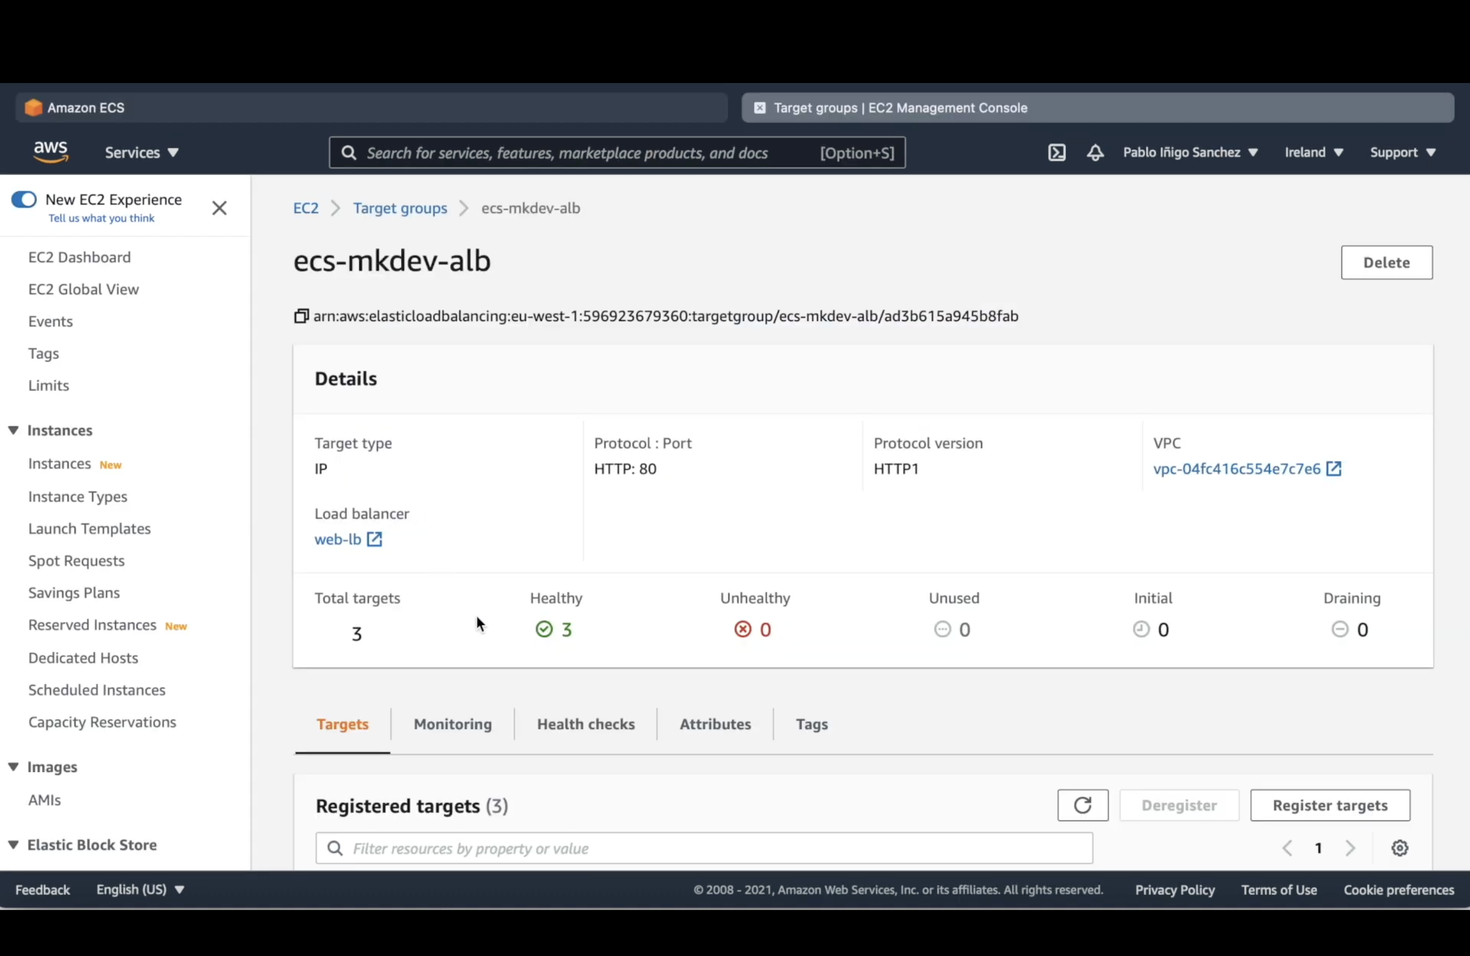
And that’s all, now if we wait for a while our 3 tasks will be up and running, and if we go to the target group we will see how our 3 tasks are there and the health check is working.