How to Deploy Google Cloud Functions with GitHub Actions

Today, we will see a practical exercise that you can reuse in your daily work later on. We are going to deploy a cloud function, but this time it is not going to be using gcloud command or the UI, we are going to use GitHub Actions.
Cloud Functions is the serverless compute platform created by Google to be used in the Google cloud. It's an event-driven model and in our example, we are going to use an HTTP call to trigger our function example.
GitHub Actions is the way used by GitHub to deploy CICD pipelines. As we can imagine is deeply integrated into GitHub and we only need to create a YAML file in the .github/workflows folder to start our pipeline. Easy and graphically ideal.
For our example the idea is simple. As soon as we push we will start a pipeline that will build, deploy and test our cloud function. Simple, I know.
Let's start with our cloud functions. As we already said, we will trigger our function as soon as we reach a URL that will be known as soon as we create our cloud function. Then when we make an HTTP call to this URL we will trigger our cloud function that will show on our screen
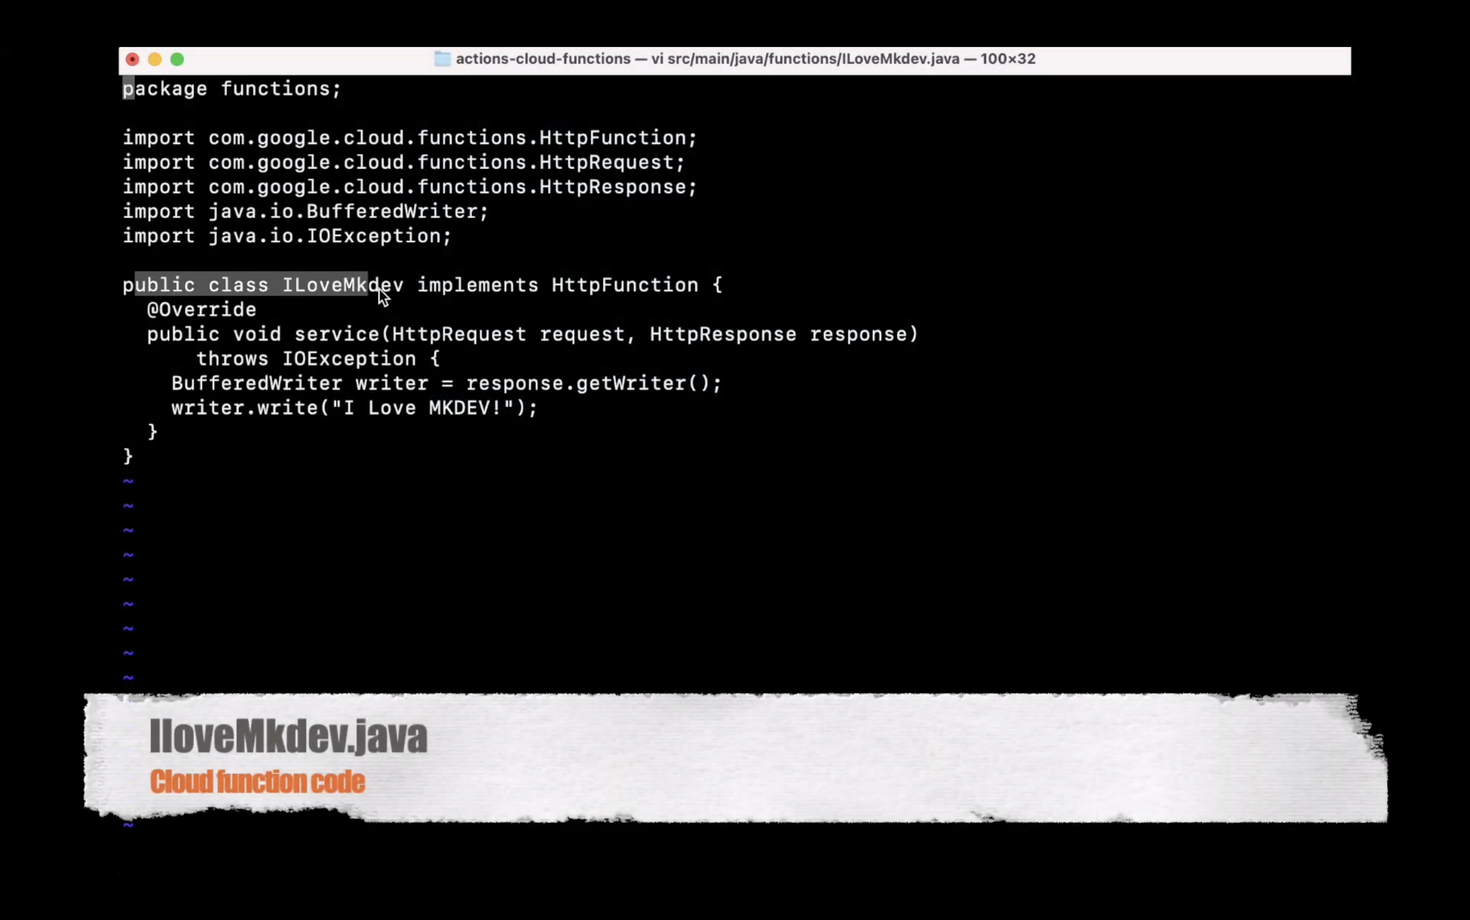
Easy. As you can see on the screen the code that I copy from google is nothing more than a class called ILoveMkdev that will show our text. and then we have a pom file that will be used to build the jar file and will contain a reference to com.google.cloud.functions, the plugin used to create our application.
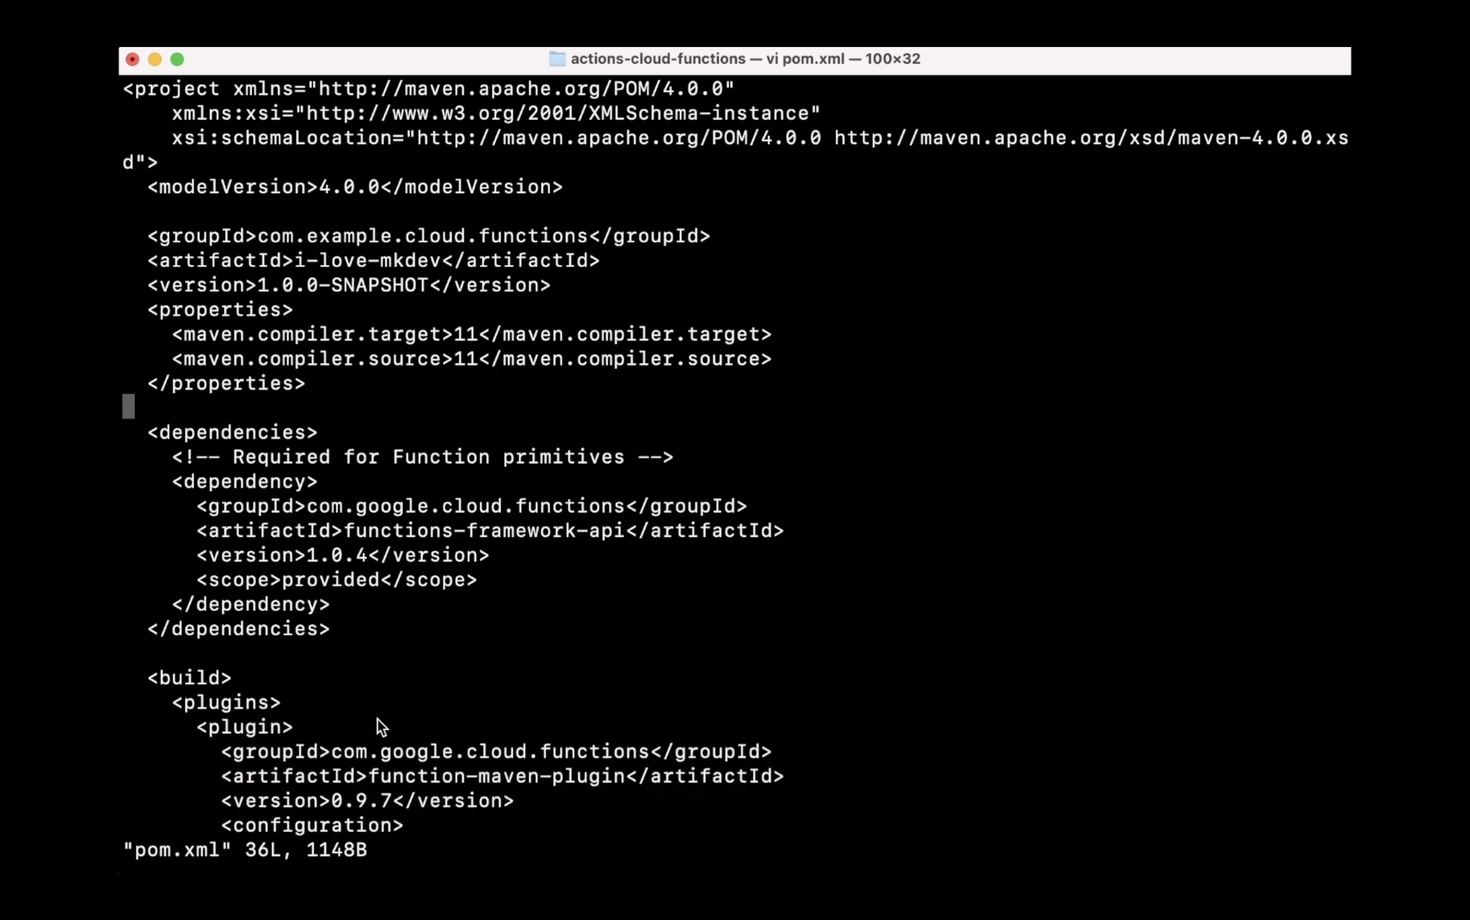
Now that we saw the code that we will deploy in our cloud function, let see the code that we will use in our GitHub Actions. As you can see it is not complicated either. This file is called pipeline.yaml will first indicate that when is going to be triggered. In our example, we will trigger our pipeline when we push in our main branch, but you can do what you want, for example, start when you push in a feature branch when you merge a pull request and many other options.
After that, we start with the jobs. GitHub Actions works similarly to Cloud Build. Every job will be executed in the same virtual machine, which in our case are ubuntu-latest but every job doesn't share variables because we are in a different possible machine.
In our example we have 1 job with 5 steps, so we can pass variables between steps.
First, we clone our code in our virtual machine, then we set up the GCP credentials. To be able to do that we had to create a secret in GitHub with a google cloud service account token. This service account will be able to manage cloud functions and will be able to execute iam.serviceAccounts.actAs.
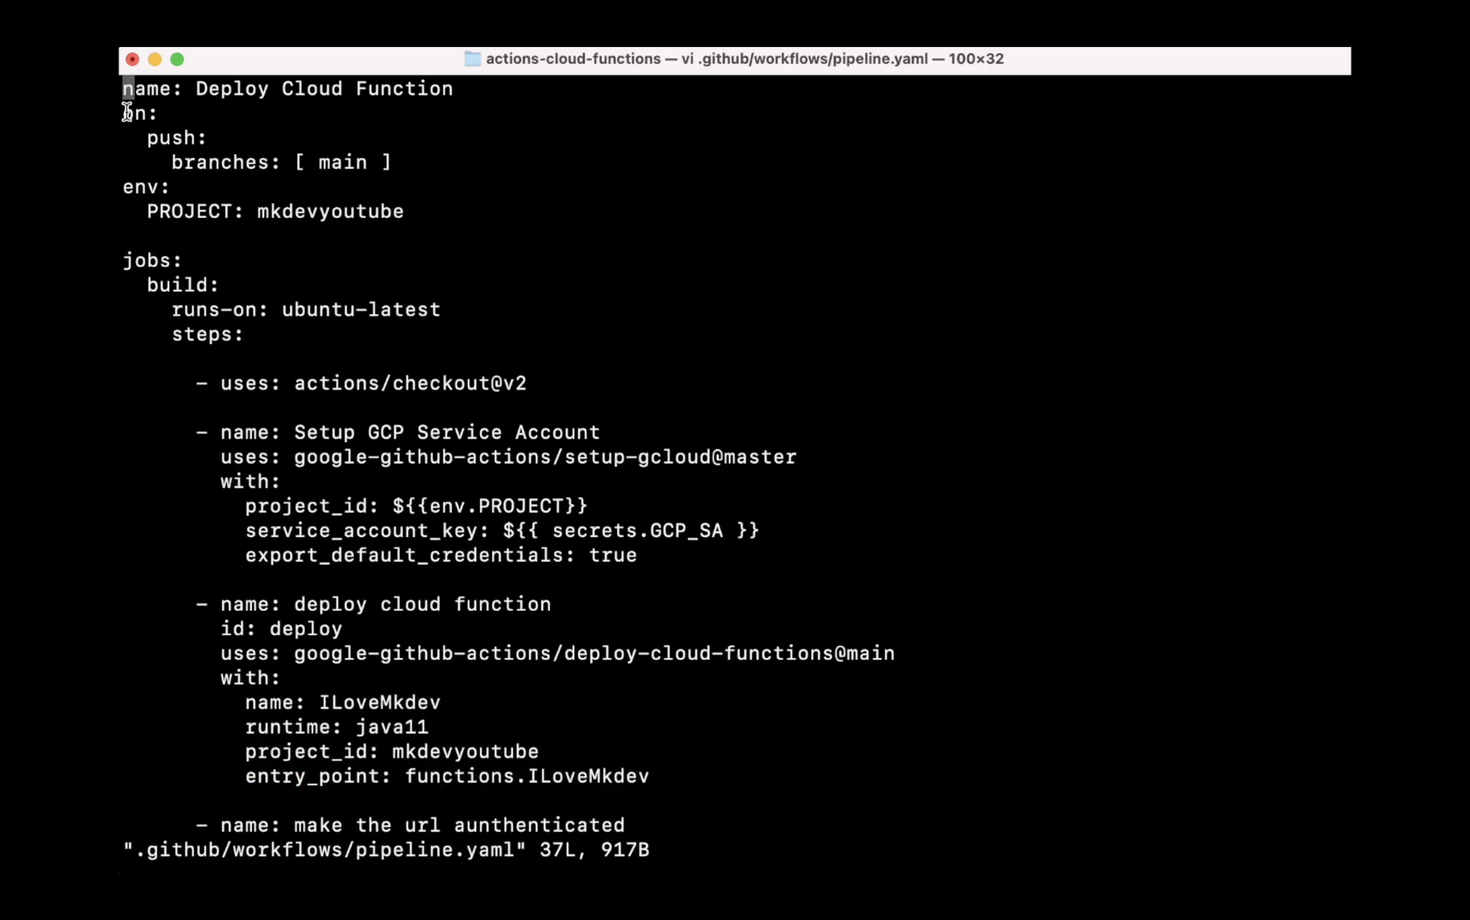
After that, we deploy the cloud function with google-github-actions/deploy-cloud-functions and as you can see we set our project, entry point, runtime and name
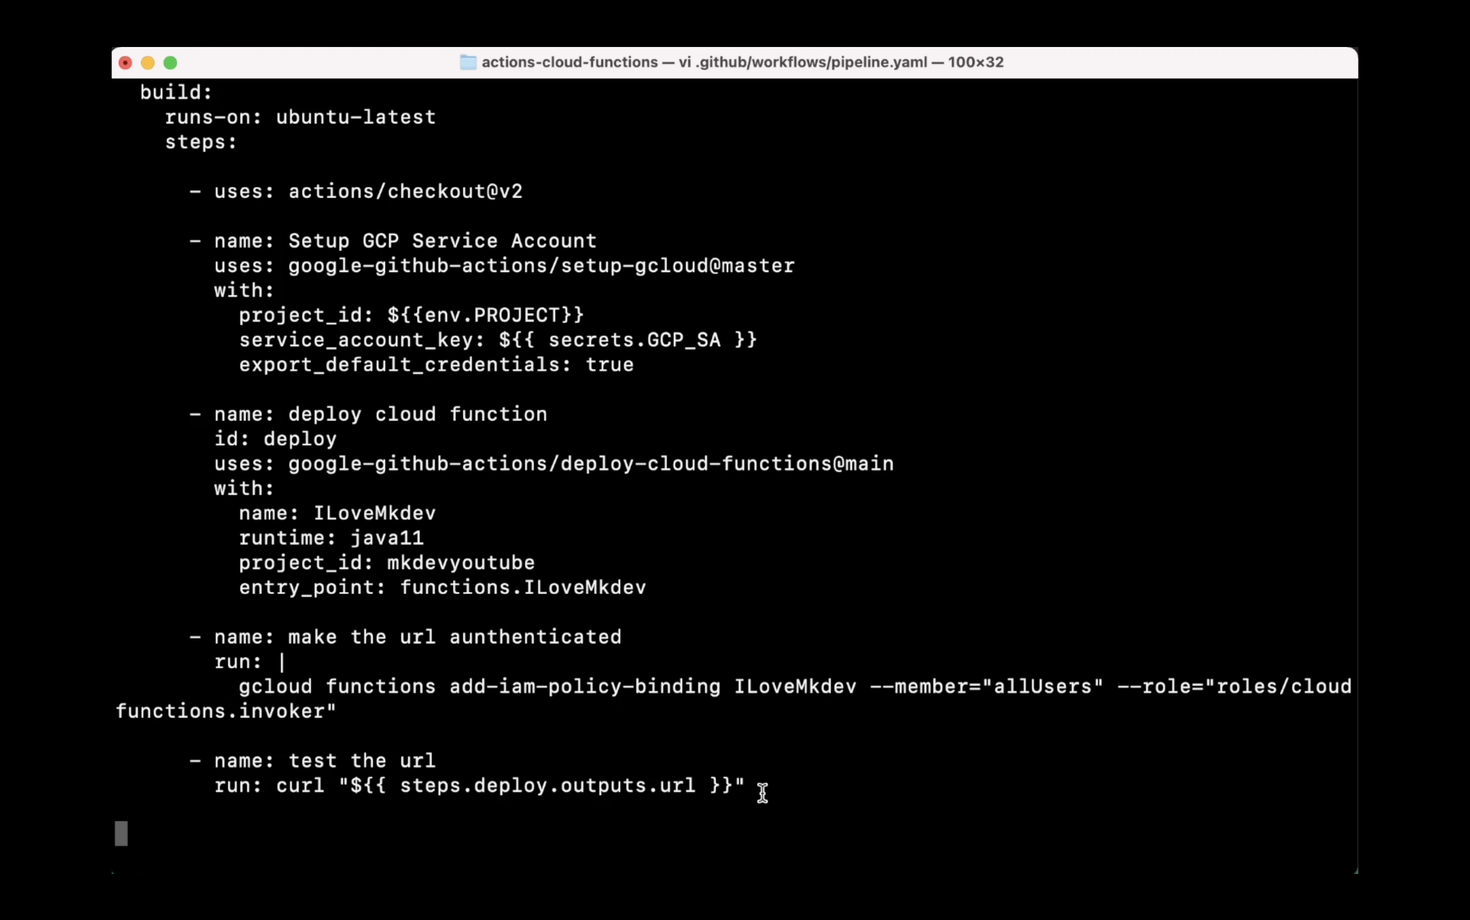
After that, a simple trick is to be able to use our HTTP without authentication and the last step is the test executing a curl in our URL. This is an interesting point because as you can see we execute curl to ${{ steps.deploy.outputs.Url }}. What we do is get in the steps, in the id deploy, the output called URL that is generated by this step.
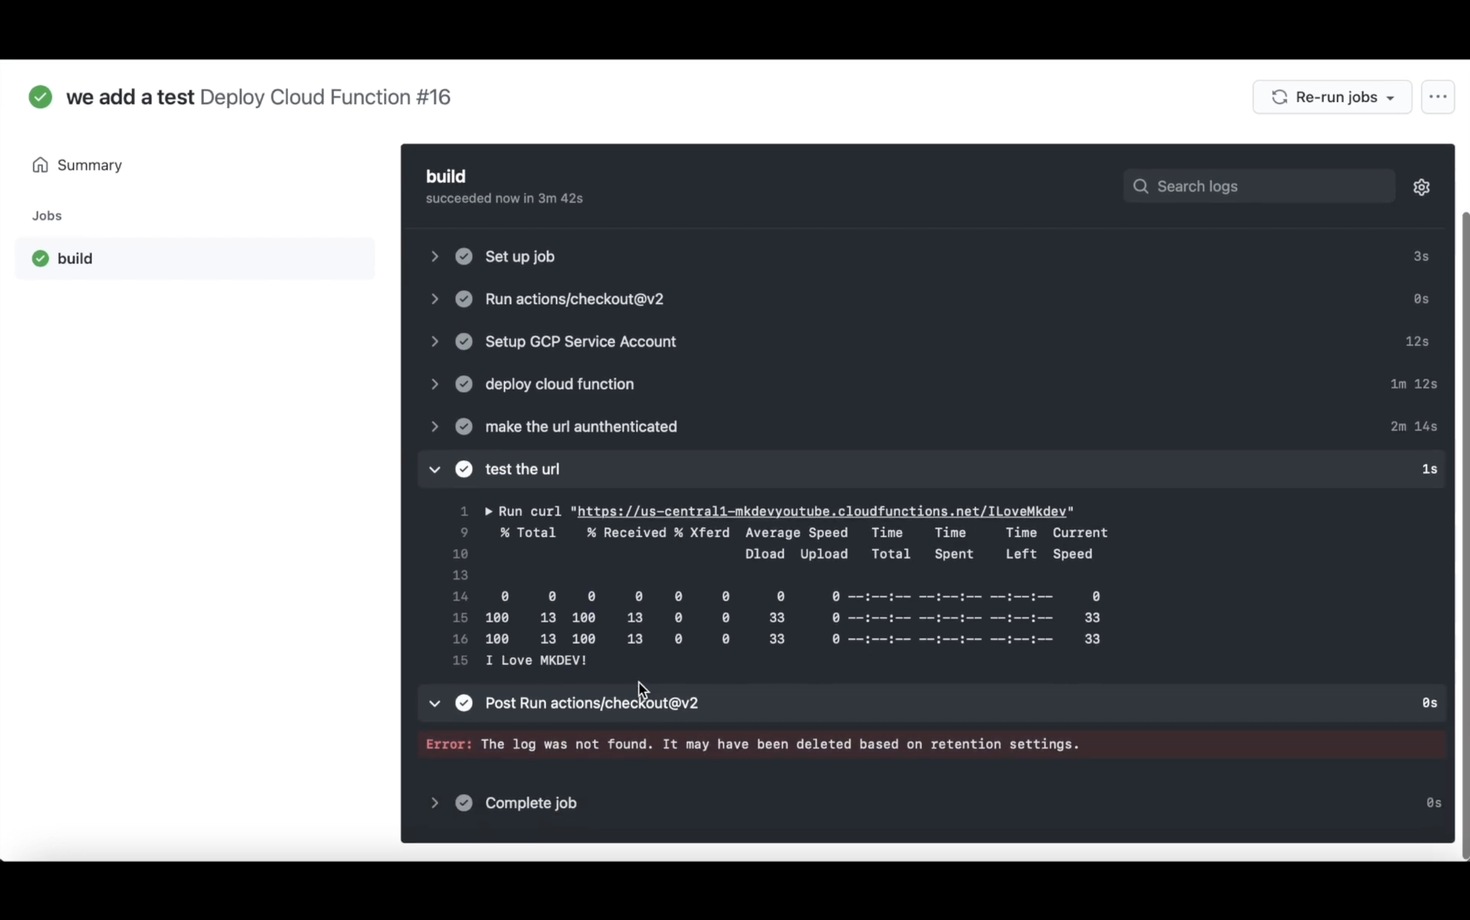
Now we only need to push our code, GitHub Actions will start to work magically, and step by step our code will be built, deploy and test. When the pipeline is executed, we can see that our function is there when we go to cloud build and then to cloud functions.
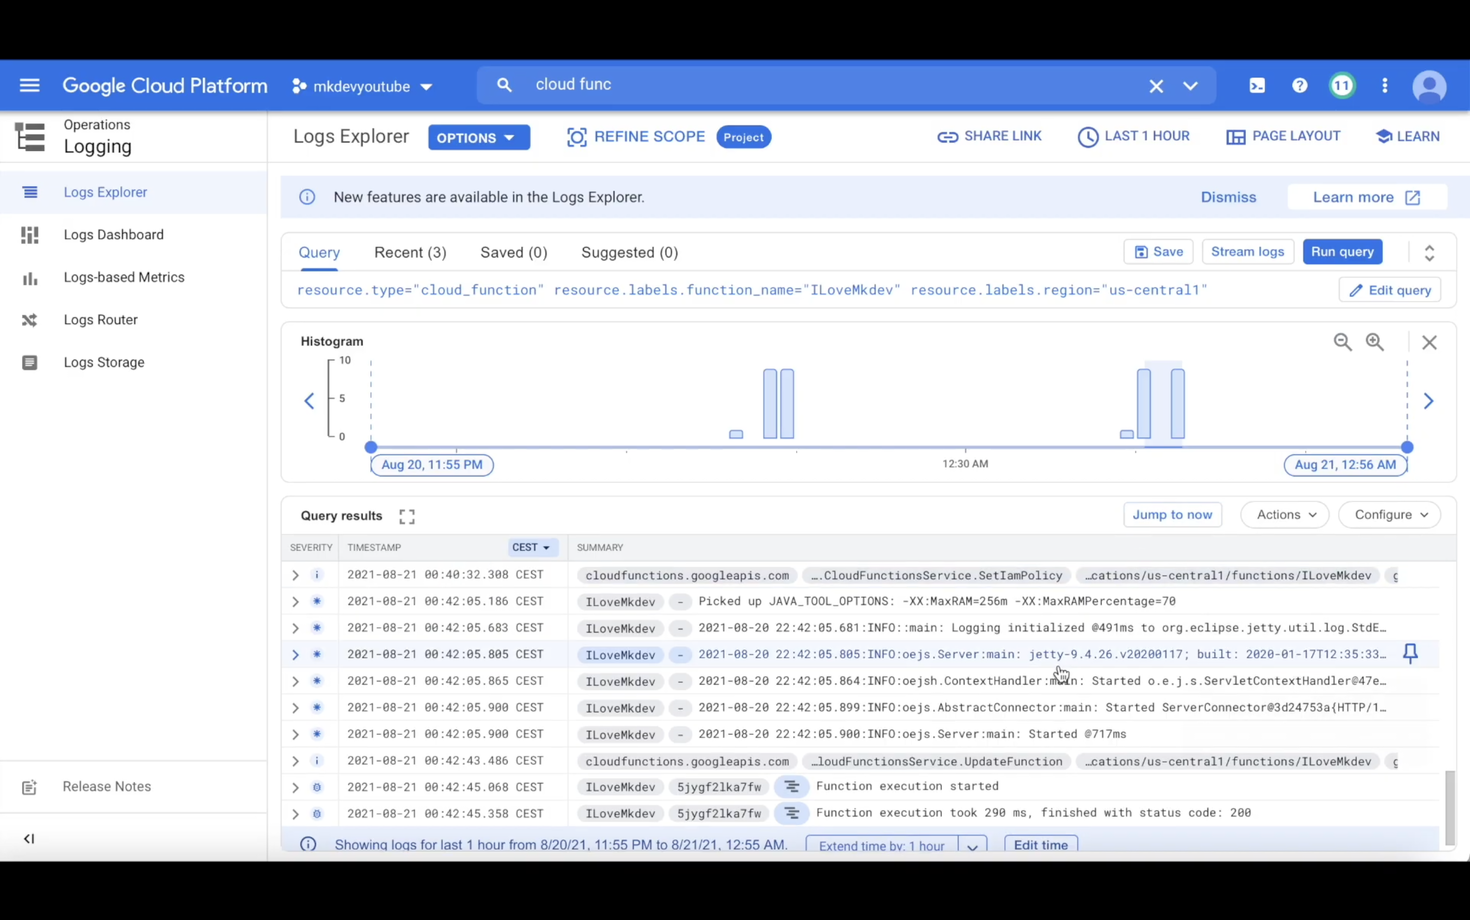
Now if we click on the three dots that we have on the right and we click on view logs we can see how the execution in our tested and if now we go to our browser and go to our URL, we have what we wanted to see since the beginning. We love mkdev

All the code is a repo here.
Here's the same article in video form for your convenience:
