3 Core Features of OpenShift 4 Cluster Management: Fedora CoreOS, cri-o and MachineSet API

This article is the second part of our OpenShift/OKD Course. In the previous chapter, we've installed a new cluster. We saw the new openshift-installer, which is a huge step forward, compared to the old Ansible-based installation method of OpenShift 3.
We also saw how this installer automatically creates a huge number of AWS resources, completely taking over the infrastructure management part of the cluster operations.
But installing the cluster is easy. The hard part starts when Day 2 operations come.
In this article, we will see some of the core features of OpenShift 4 that make managing and operating the cluster much easier.
When finished, openshift installer gave as the password for the default kubeadmin user.
With these initial credentials we can further configure the cluster.
Kubernetes audit: it's a complex framework, and it's tricky to get it right. We are here to help you with that. About Kubernetes audits
Let's head to the OpenShift console.
I am going to accept the self signed certificates that the cluster generated automatically.
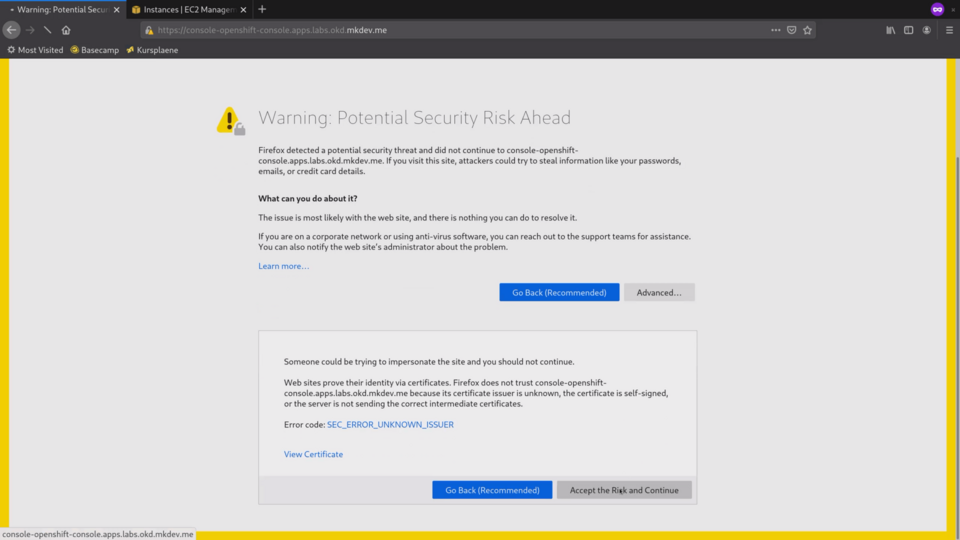
You should supply your own certificate after the cluster is installed.
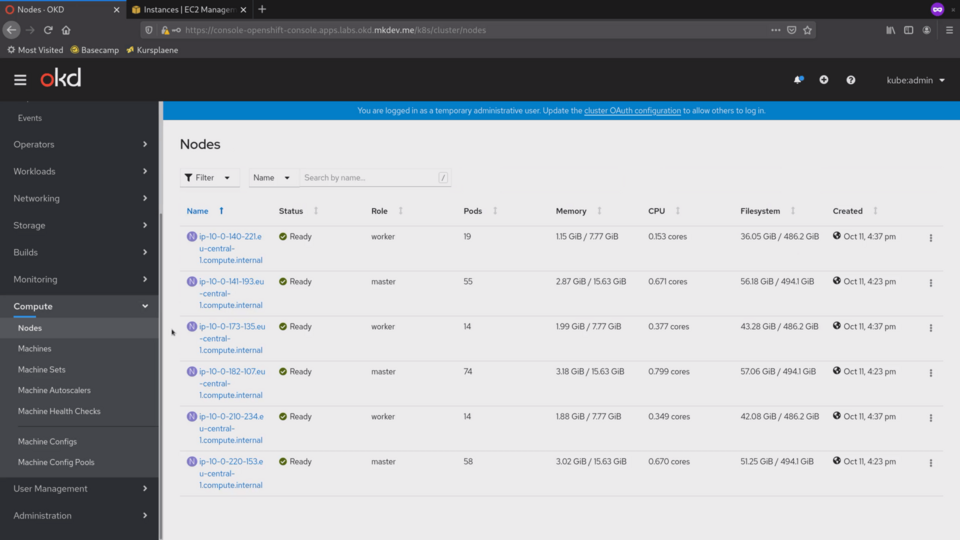
First thing I want to show is the Compute tab on the left.
In the nodes section we can see all the cluster nodes:
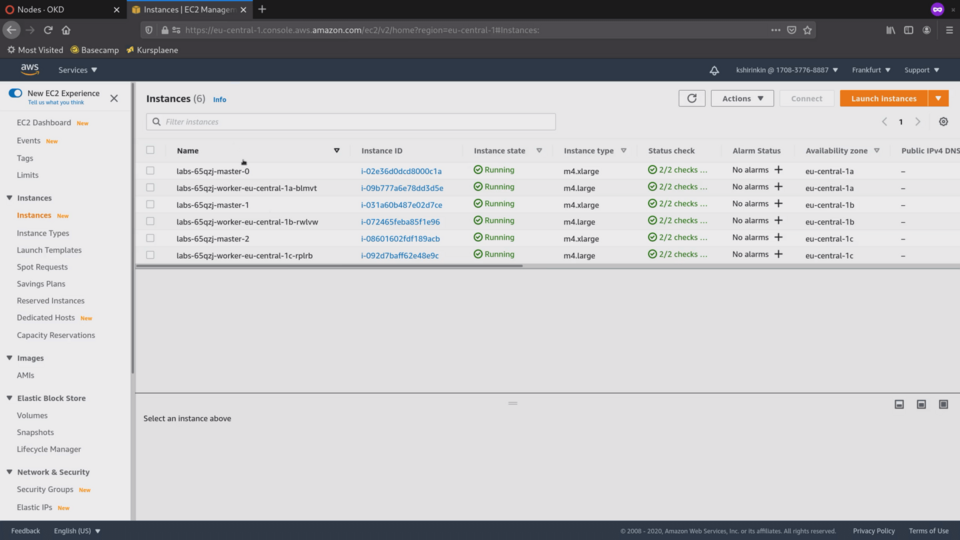
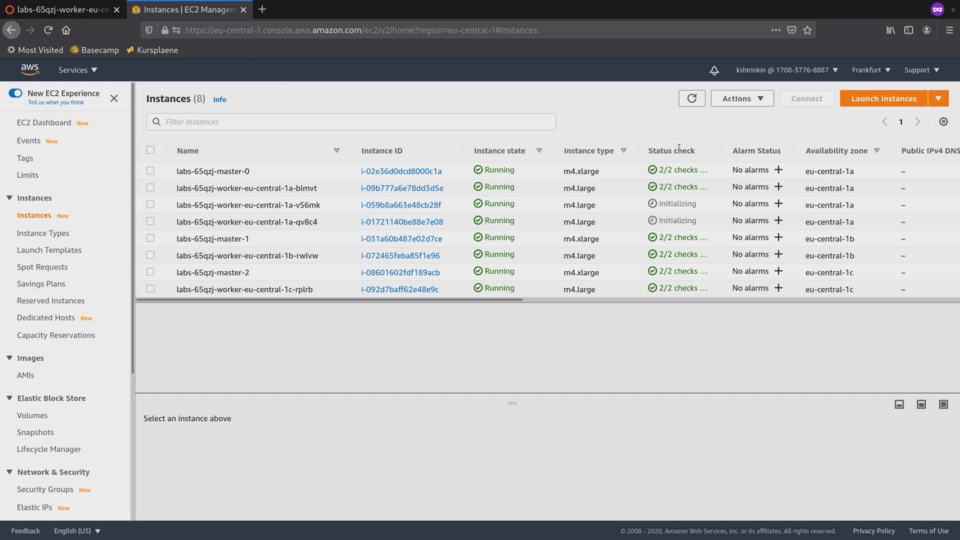
We can also see them in the AWS console:
When I click on one of the nodes, I can see many details about it, including system metrics, collected by the built-in Prometheus.
There is a stream of all events that are happening on this node on the right side.
We can see more details in the Details tab.
Most interesting details are the Operating System that is used and the container runtime.
Every node in the cluster uses immutable container operating system called Fedora CoreOS.
The default container runtime in OpenShift is cri-o, special lightweight and more secure container manager purpose-built for Kubernetes.
Let's check the pods section:
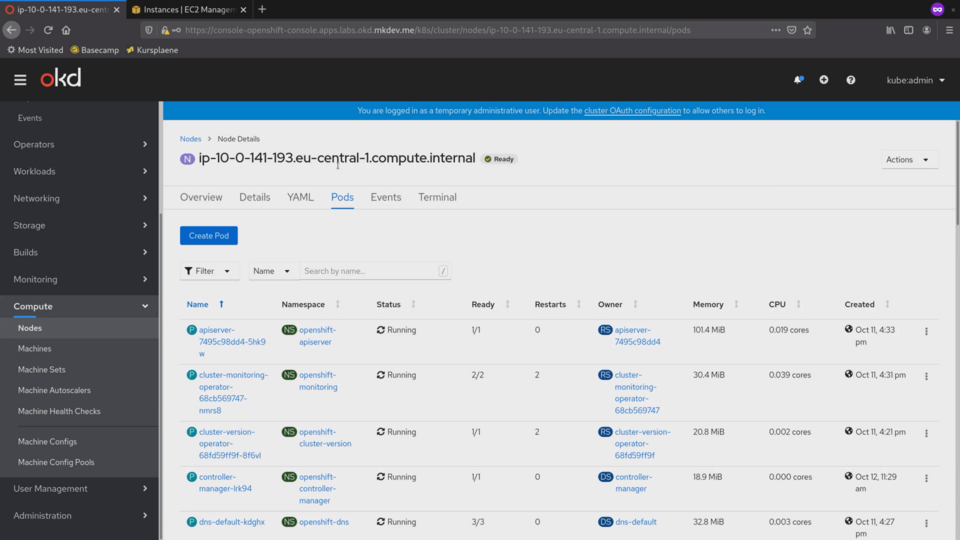
Here we can see all the pods that are running on this node.
There are already over 50 pods running on this node. OpenShift 4 runs every cluster component as a container.
The container network runs in a container, the etcd database runs in a container and every Kubernetes component, like an api server or the scheduler, runs in a container as well.
Because we are looking at one of the master nodes, it has much more containers compared to the regular worker node.
As you can imagine, this makes it very easy to update and fix the cluster. In many situations, you can simply kill some pods to reset them to the proper state.
I can also get a shell into the node right here, from the Terminal tab.
In theory, you can opt out of SSH access completely and, if necessary, use this Terminal for debugging.
Let's give it a try.
I need to chroot to get access to the full host system.
What I have here is Fedora CoreOS.
I made an article about container operating systems recently, check it out for details about how Fedora CoreOS works.
In short, it's the immutable container-focused OS.
It's sole purpose is to run containers and nothing else.
If I check the status of the docker daemon I will see that its not running.
The reason is that OpenShift does not use or need Docker.
For building container images, it uses Buildah and for minor cluster maintenance tasks it uses Podman.
There are videos on our channel about both Buildah and Podman, check them out to learn more about these tools.
The reason Docker is installed at all is because Fedora CoreOS ships with both Podman and Docker container managers out of the box.
OKD is using the base Fedora CoreOS installation, and that's why Docker is not removed.
To actually run containers OpenShift uses cri-o, container runtime specifically for Kubernetes clusters.
If I run crictl ps, I will see lots of containers running, for all the pods that we saw just a few seconds ago.
Just a side note: Buildah, Podman and Cri-O comply with the standards of Open Container Initiative, so there is no problem if you want to use Docker on your laptop and OpenShift in production.
One of the many benefits of running everything in containers and using Fedora CoreOS is the ease of upgrades.
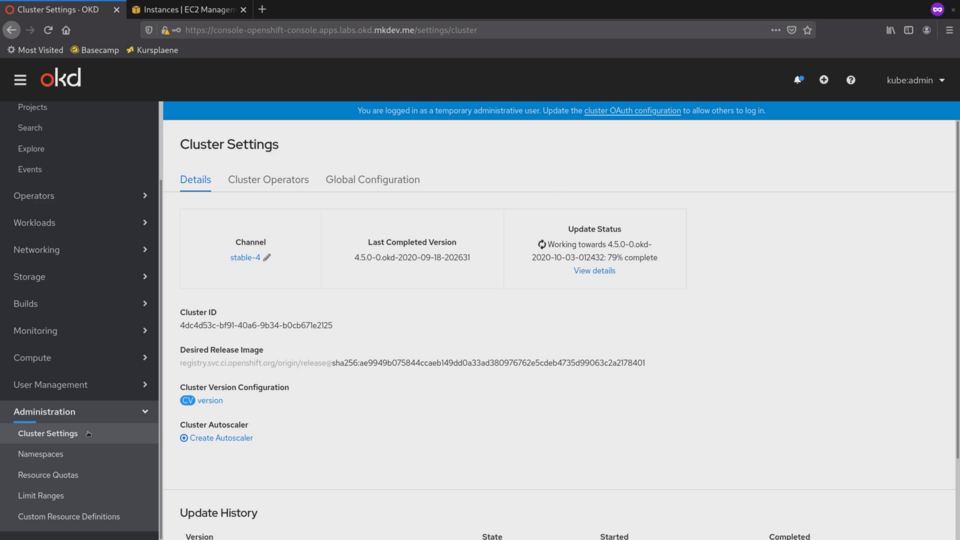
Let's go to the Administration submenu, to the Cluster Settings section.
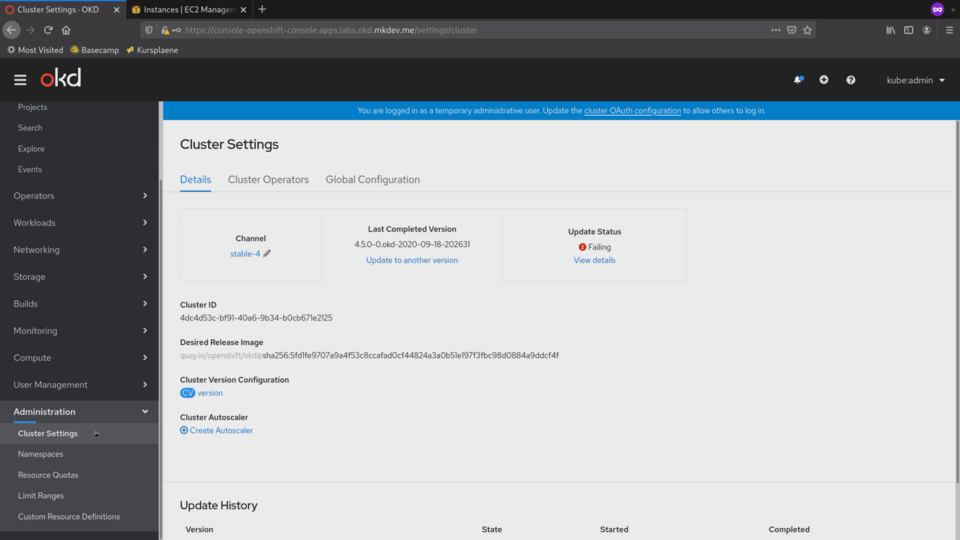
Ignore the Failing Update Status. There is a minor issue with one of the cluster operators, but.. we will talk about cluster operators in a separate video.
On this page, we can see the current version of the cluster.
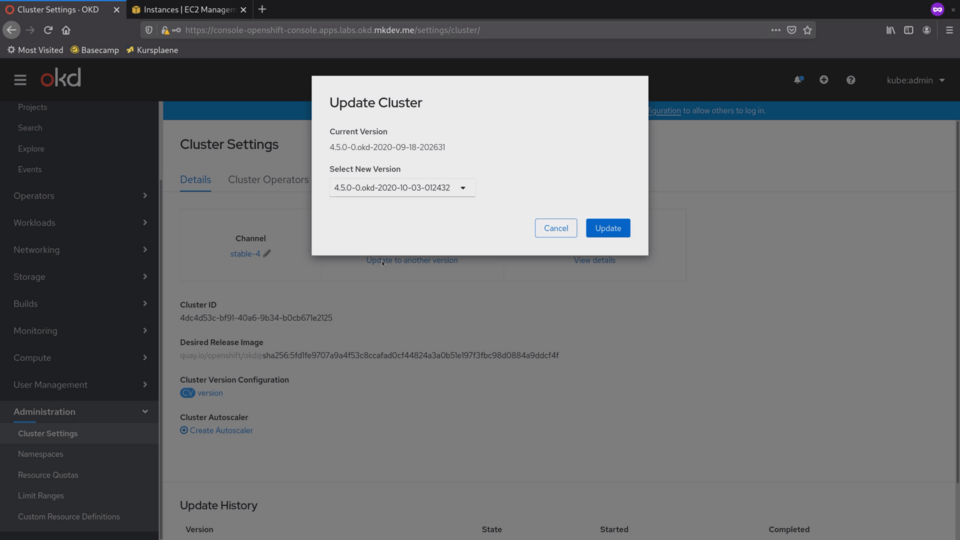
Right here, from this page we can trigger the cluster upgrade.
If you used OpenShift 3, you might know how horrible the upgrade process was.
In OpenShift 4 it's a couple of clicks in this interface and then the cluster updates itself automatically.
Let's give it a try and upgrade the cluster.
Because it uses atomic OSTree based operating system updates and because every cluster component is containerized, it's really easy to apply changes.
In most cases, you only need to trigger it via the interface and observe the zero downtime rollout of the new version.
We can proceed with learning more about the OpenShift while the cluster upgrades itself.
Another huge improvement in regard to the cluster management is the Machine API.
We already saw Nodes, which represent your Kubernetes nodes. On top of that there are Machines, which are basically connections between your infrastructure provider and your Kubernetes nodes.
We can see in this list of machines how each of them maps to a specific node:
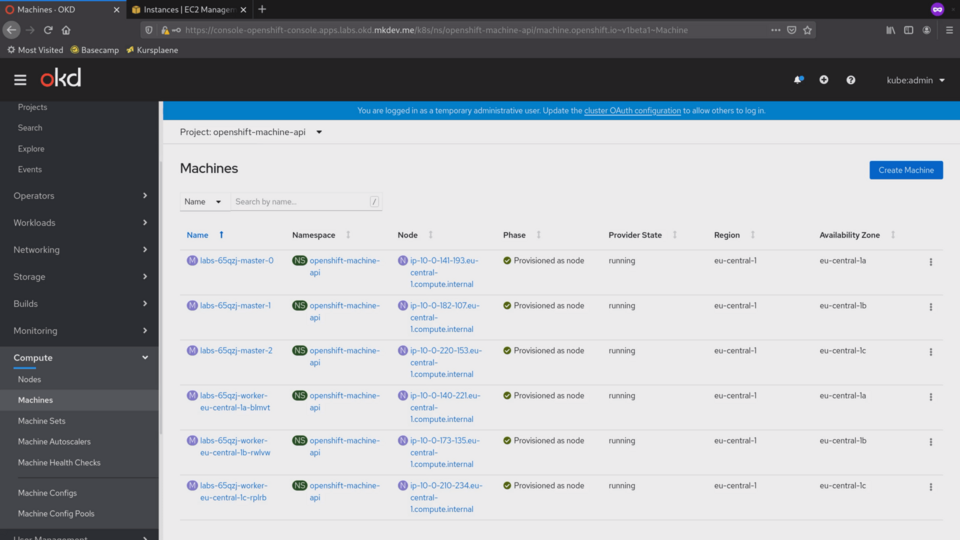
What it means is that when you delete the Machine, it will not only remove the Node from the cluster, it will remove the actual virtual machine.
Machine itself is not really interesting.
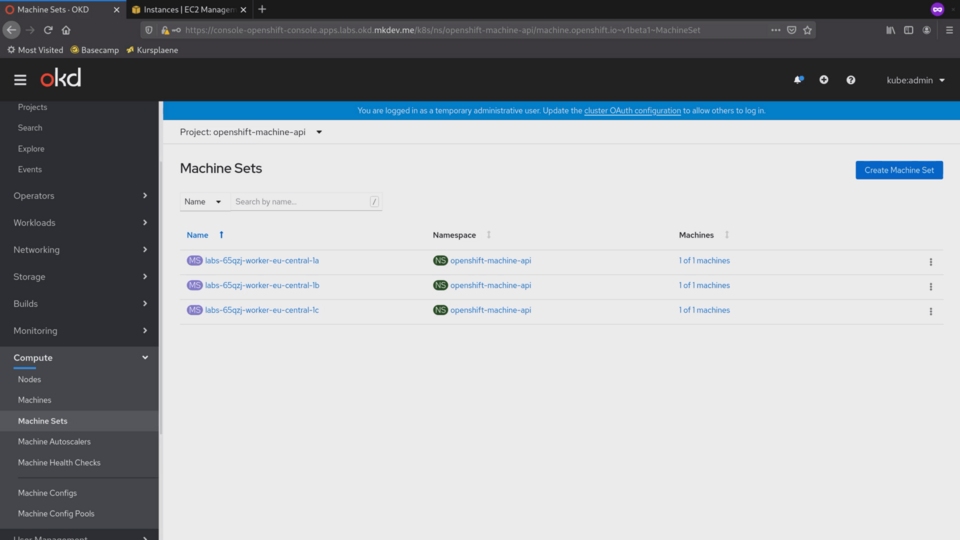
The best part of the Machine API is the MachineSet feature. Let's check the machine sets we have.
Every managed Kubernetes provider has some kind of node groups feature, that allows you to scale the cluster up and down, including via the auto-scaling.
MachineSet implements this functionality in a cloud-agnostic way.
We have 3 MachineSets in this cluster, one per availability zone.
Notice that control plane is not managed as a MachineSet, because scaling the control plane is not as straightforward as regular worker nodes.
Let's say, I want to have 3 instances in the first MachineSet.
I can just open the machine set and then edit the Desired count from 1 to 3.
You should keep in mind, that everything you see is an API object that can be configured and deployed as a YAML file.
Nothing stops you from storing the machine set definitions in a git repository and applying them via the CI pipeline. This is how you are supposed to manage your cluster.
Now if we go to the Machines tab, we see two new Machines being provisioned:

They don't have the node attachment yet, because the node exists when Kubernetes node is configured and connected to the cluster.
Things like node registration, node certificate rotation and many-many other things are abstracted away by the OpenShift.
If we check the EC2 interface, we will see 2 new EC2 instances in Initialization stage:
It takes some time for the machine to download the latest updates, install all the software and connect to the control plane.
Remember, that we are also running the cluster upgrade in parallel to scaling the cluster up.
Now we can see that two new machines are provisioned, meaning that the node configuration has already begun.
Finally, nodes are provisioned as well. Lets get back to the machine set.
From here we can open the new node. It's still not ready and does not report any metrics. But if we check the pods tab, we will see that Cri-O already started some containers.

It needs to start dedicated containers for the networking, monitoring, machine configuration, DNS and so on. Remember, that everything that happens in the cluster runs inside containers.
The node became ready, and we can see the first metrics arriving to the built-in Prometheus.
Let's check what's going on with the cluster upgrade.
It's already 79% done.
If I open the Cluster Operatos tab, I will see which exact components are being updated right now.
At this time, Kubernetes API Server is updating, as well as the network operator and few more.
Every part of the cluster is managed with the special cluster operator. There are operators to manage the network, authentication, monitoring, api servers and so on.
After each operator is updated, OpenShift will start patching the nodes.
It does it by downloading the new OSTree layer and rebooting each node, one by one.
It takes some time and I won't bore you with this.
I hope you see how much nicer the cluster management has become in the OpenShift 4.
Even if you are using Kubernetes directly, there is a lot to learn from how OpenShift does things like cluster maintenance, monitoring, developer tooling and many other things.
In the next chapter we will talk about configuring the cluster nodes to suit your needs. That can involve adding the SSH keys or configuring the internal ntp server. We will see the MachineConfig API in action and try to do something useful with it.
But that's it for this article!
Here it is in video form, so you can listen to it on the go:
Article Series "OpenShift/OKD Course"
- Production OpenShift Cluster in 35 Minutes: First look at OKD 4 and the new OpenShift Installer
- 3 Core Features of OpenShift 4 Cluster Management: Fedora CoreOS, cri-o and MachineSet API
- How to Configure OpenShift 4 Cluster Nodes: MachineConfig Operator and CoreOS
- OpenShift 4 Troubleshooting: Your Cluster is Broken, What's Next?